
Opening Checklist Verification
Evaluates restaurant opening-readiness checklist items from an image and returns a structured JSON output with a calculated readiness score.
datasciencealliance-org.describe.opening-checklist:latest
Prompt
You are given an image of a restaurant during opening hours. Your task is to assess a fixed set of opening-readiness checklist items based on what is clearly visible in the image. Return ONLY valid JSON. Do not include explanation, markdown, or commentary.
...Run the full prompt in your EyePop.ai dashboard
Input
Image
Output
JSON
Image size
640x640
Model type
EyePop.ai VLM

How It Works
Describe with Opening Checklist
As its name implies, the Describe Image task on the Abilities tab does exactly that: it describes an input image with a description. We can use this to assess whether a restaurant is ready to open by checking a fixed set of visual readiness indicators, allowing businesses to automatically verify opening procedures without a manager walking a physical checklist.
We can use the Describe Image task to evaluate a photo of the restaurant against a standardized opening checklist: registers staffed, dining room prepared, exterior signage visible, menu boards active, beverage station stocked, condiment station stocked, and doors unlocked. By automating this visual inspection, businesses can confirm opening standards are met consistently across locations, catch missed setup steps before customers arrive, and reduce reliance on manual walk-throughs.
With this ability, it returns a structured JSON object scoring each checklist item as True, False, or N/A (if that element isn't visible in the image), along with an overall readiness score calculated from the visible, applicable items. For example, the output of this image returns:
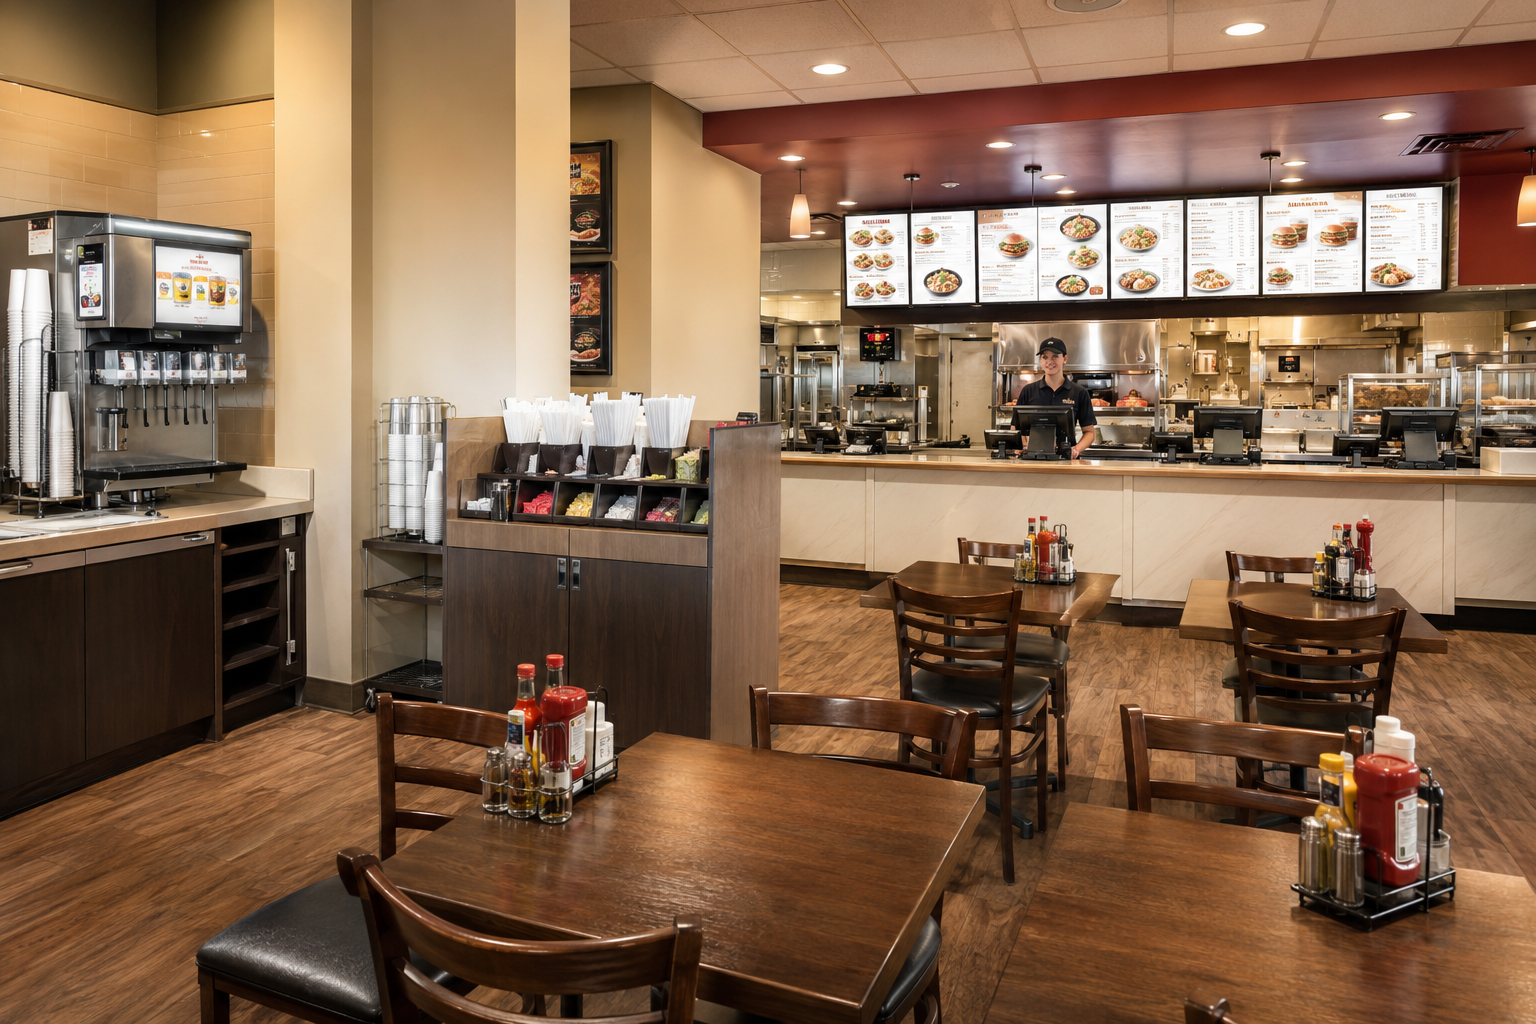
{
"Register_staffed": true,
"Dining_room_prepared": true,
"Exterior_signage_visible": null,
"Menu_board_active": true,
"Beverage_station_stocked": true,
"Condiment_station_stocked": true,
"Door_unlocked": null,
"Overall_readiness_score": 10
}
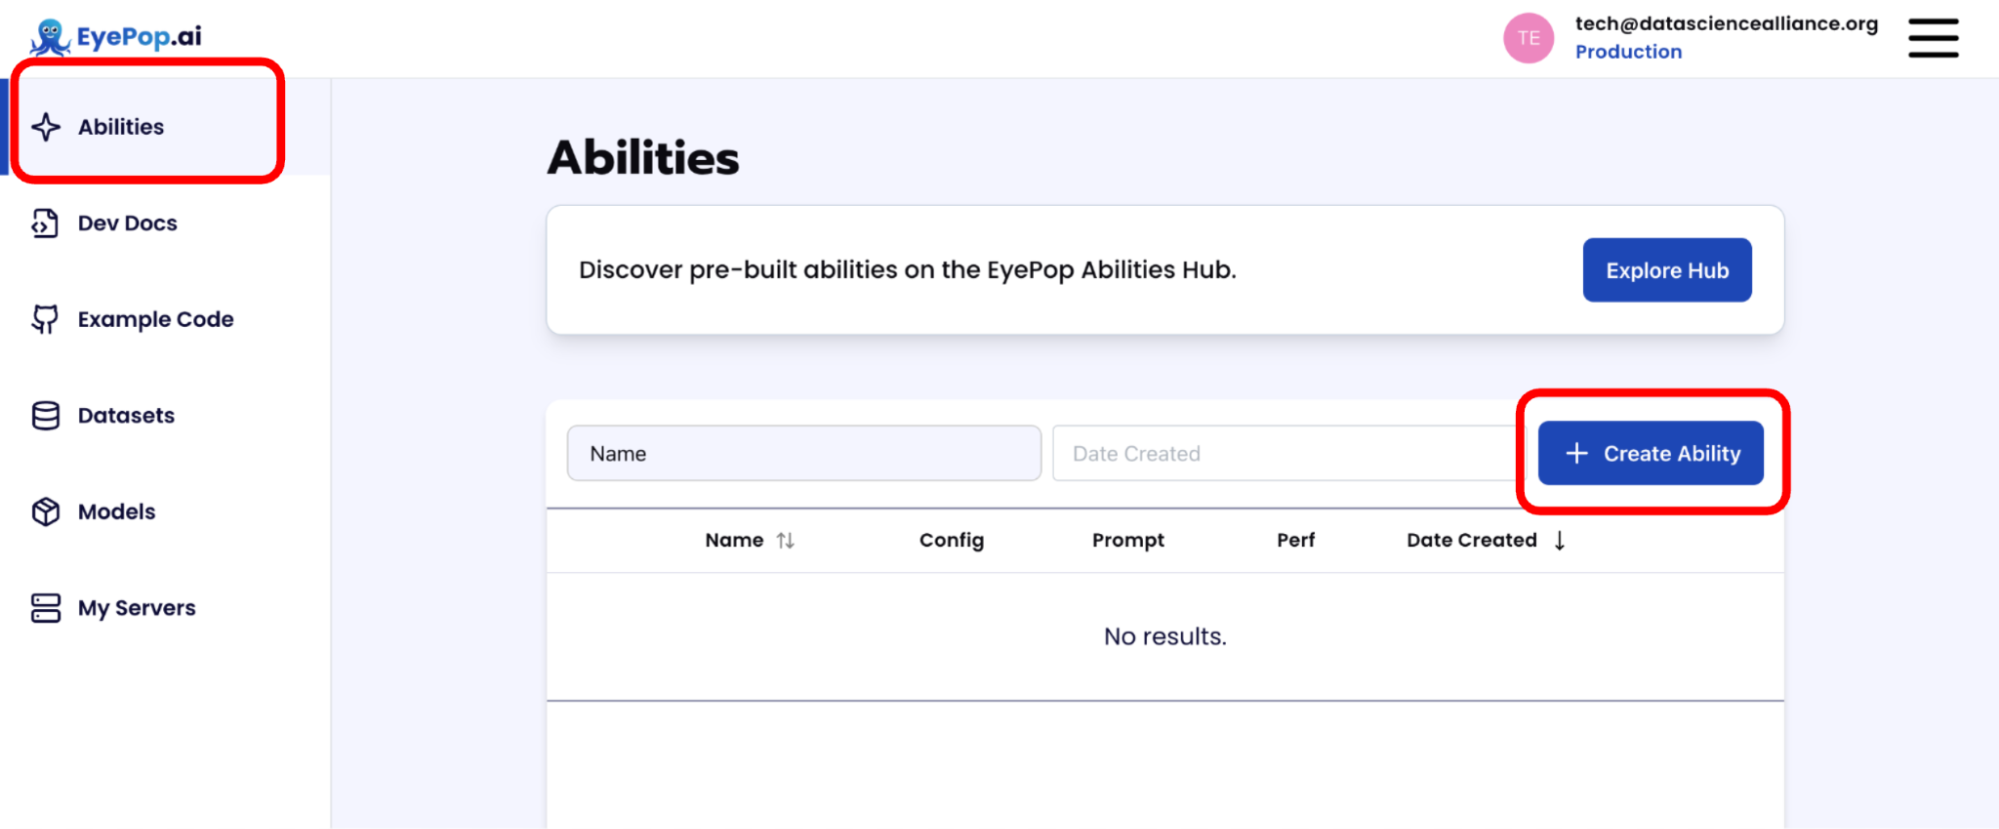
Step 1: Create an Ability
Go to the Abilities tab and select the button Create Ability.
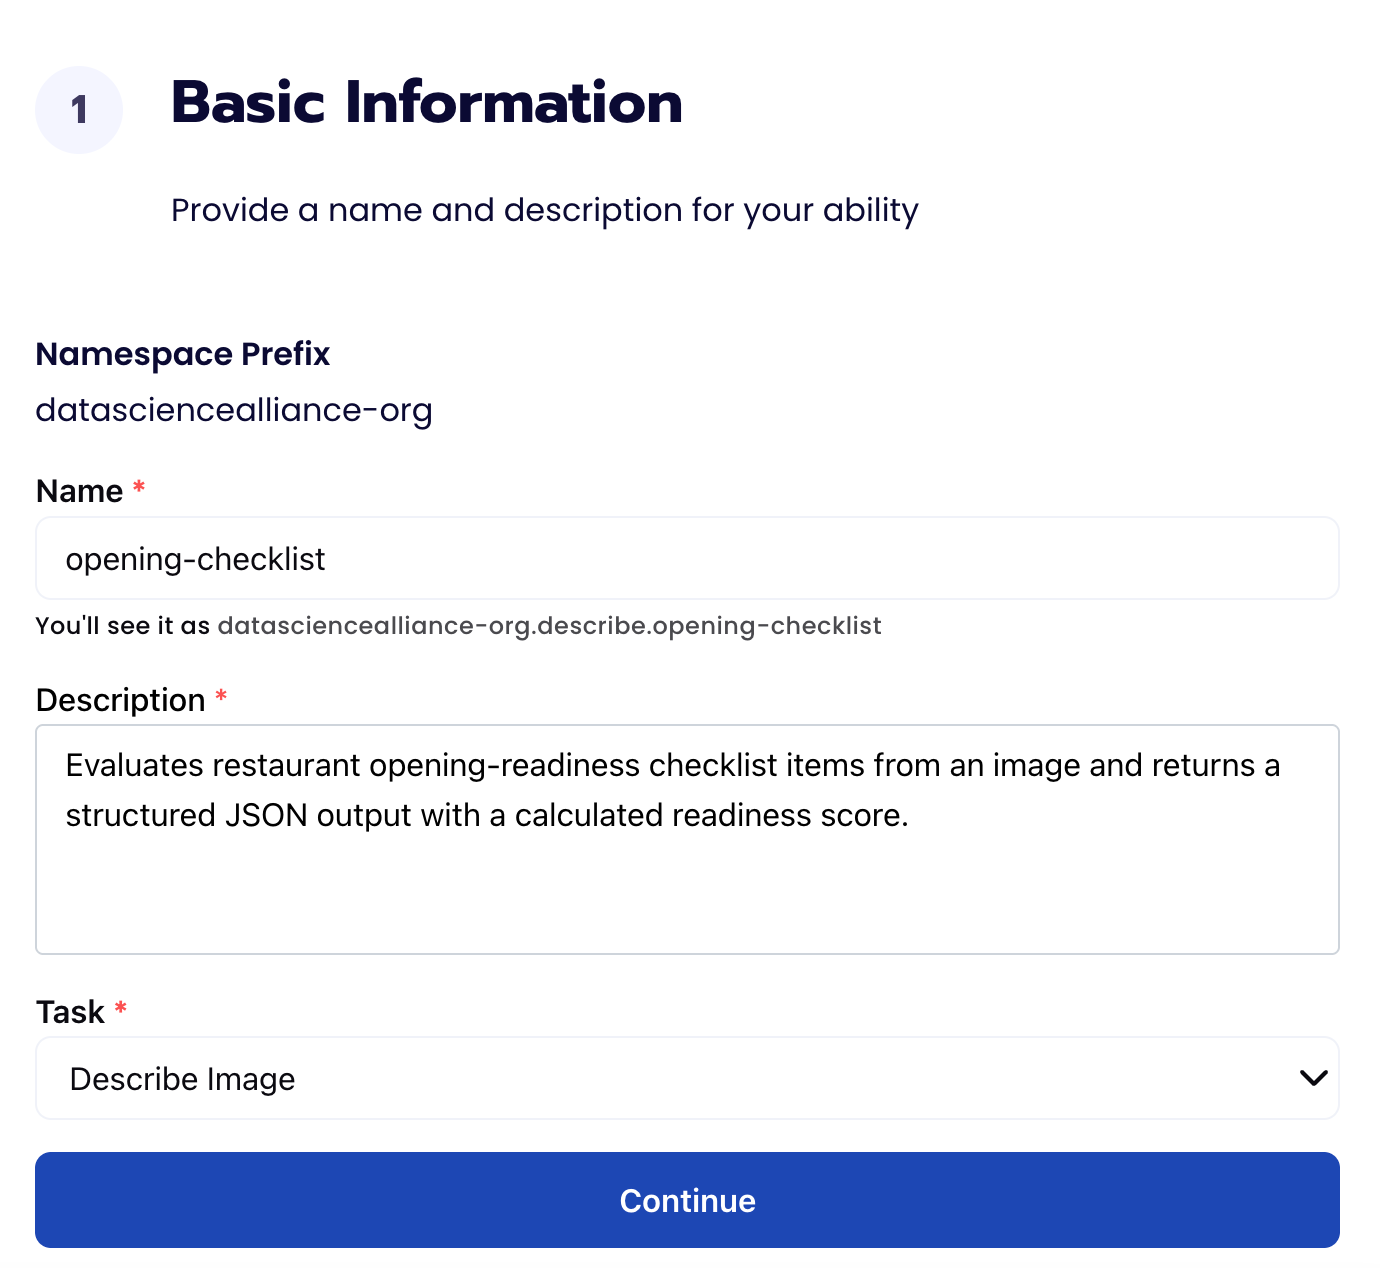
Fill out basic information about the ability such as its name and the description of the task itself. Since we are describing an image, select the Task Type as Describe.
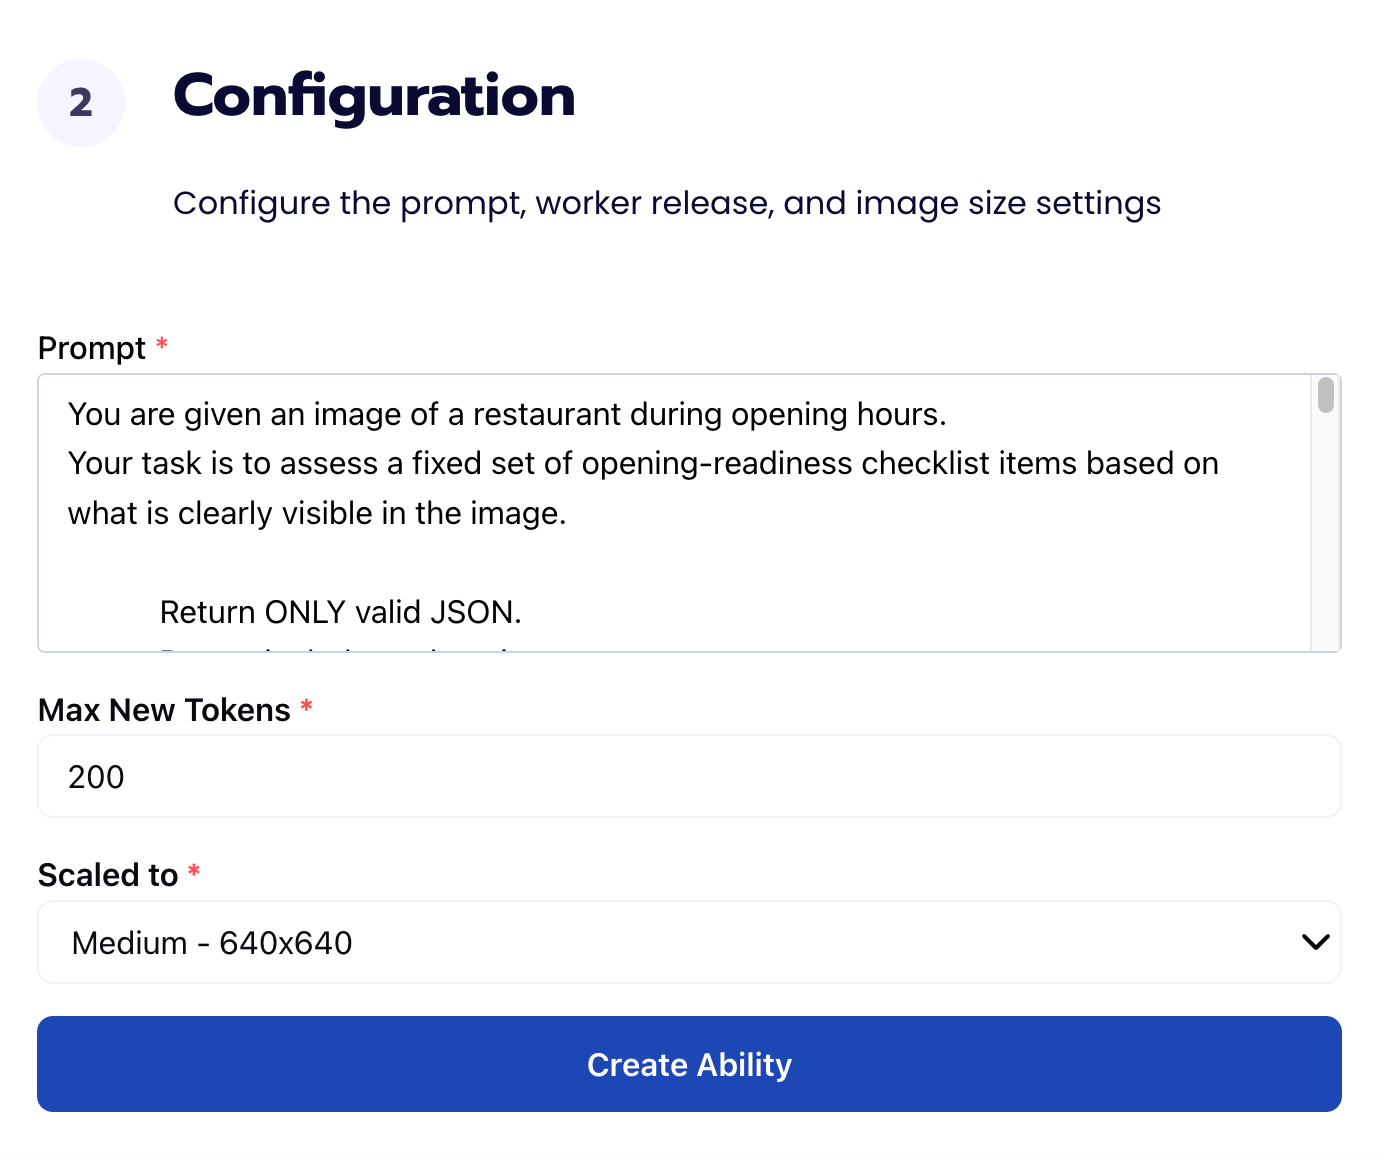
Step 2: Configuration
Our next step is to configure the prompt, select the model, and image size. For this use case, we recommend using the below prompt and settings for highest accuracy and best results.
The prompt we can use is above.
Step 3: Test an image through Preview
Click the three vertical dots next to your ability and then click Preview.
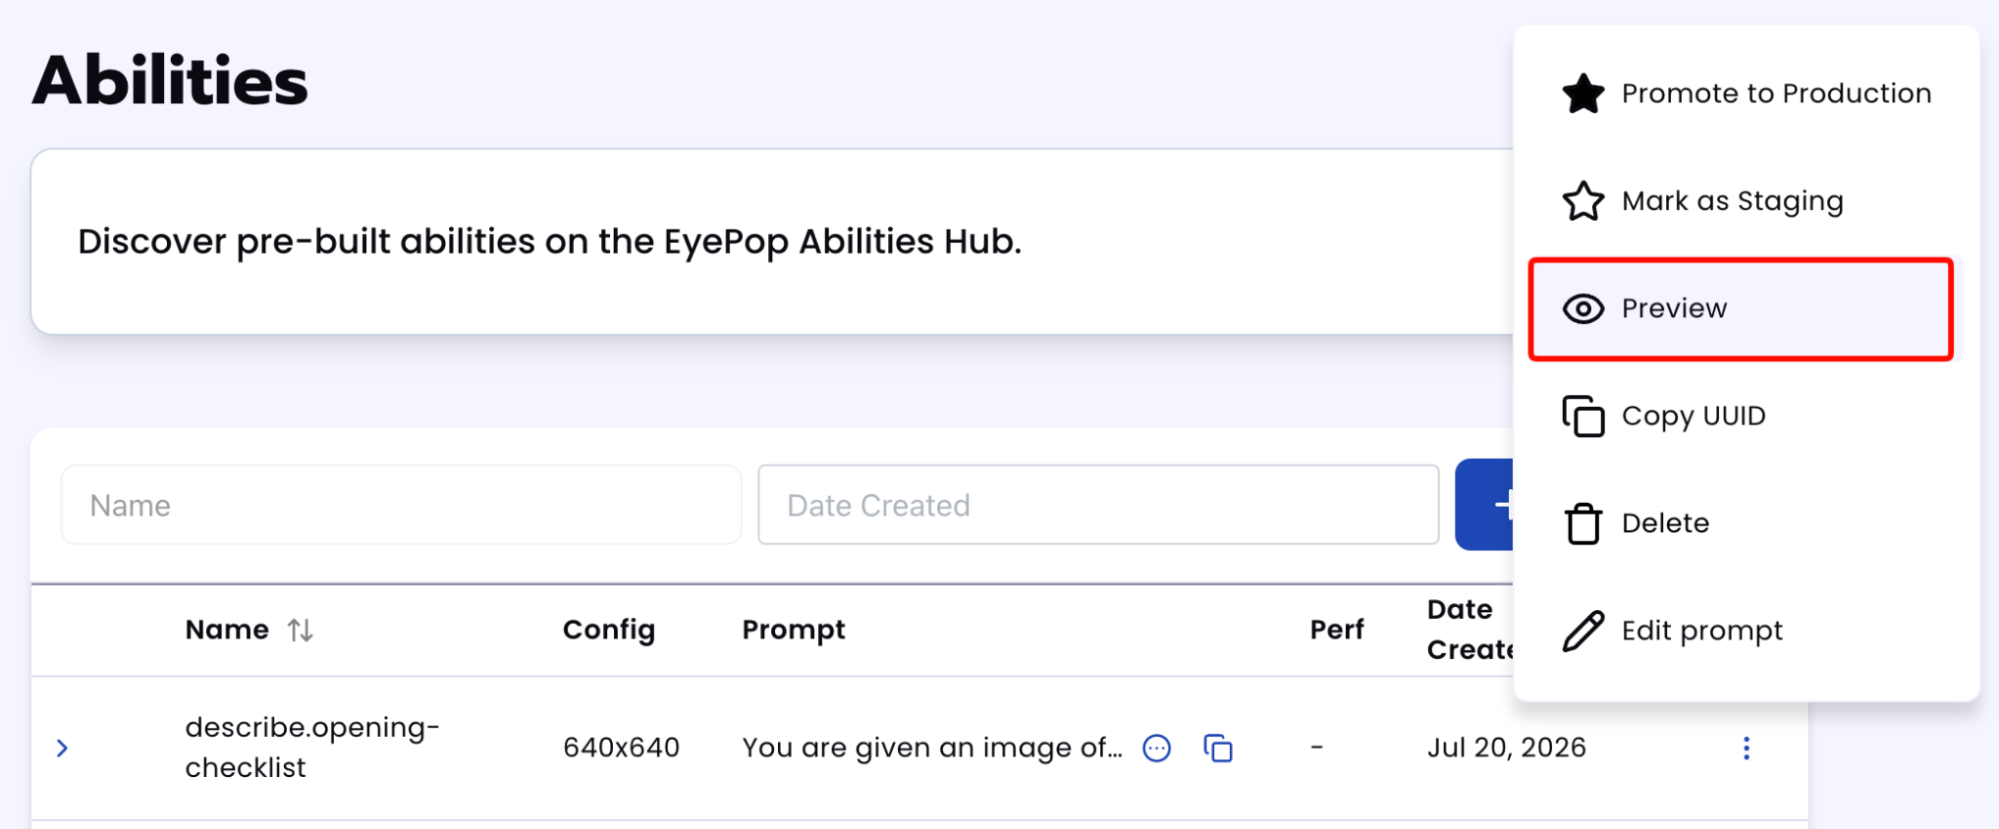
After uploading your file, you should get an output that looks like this:
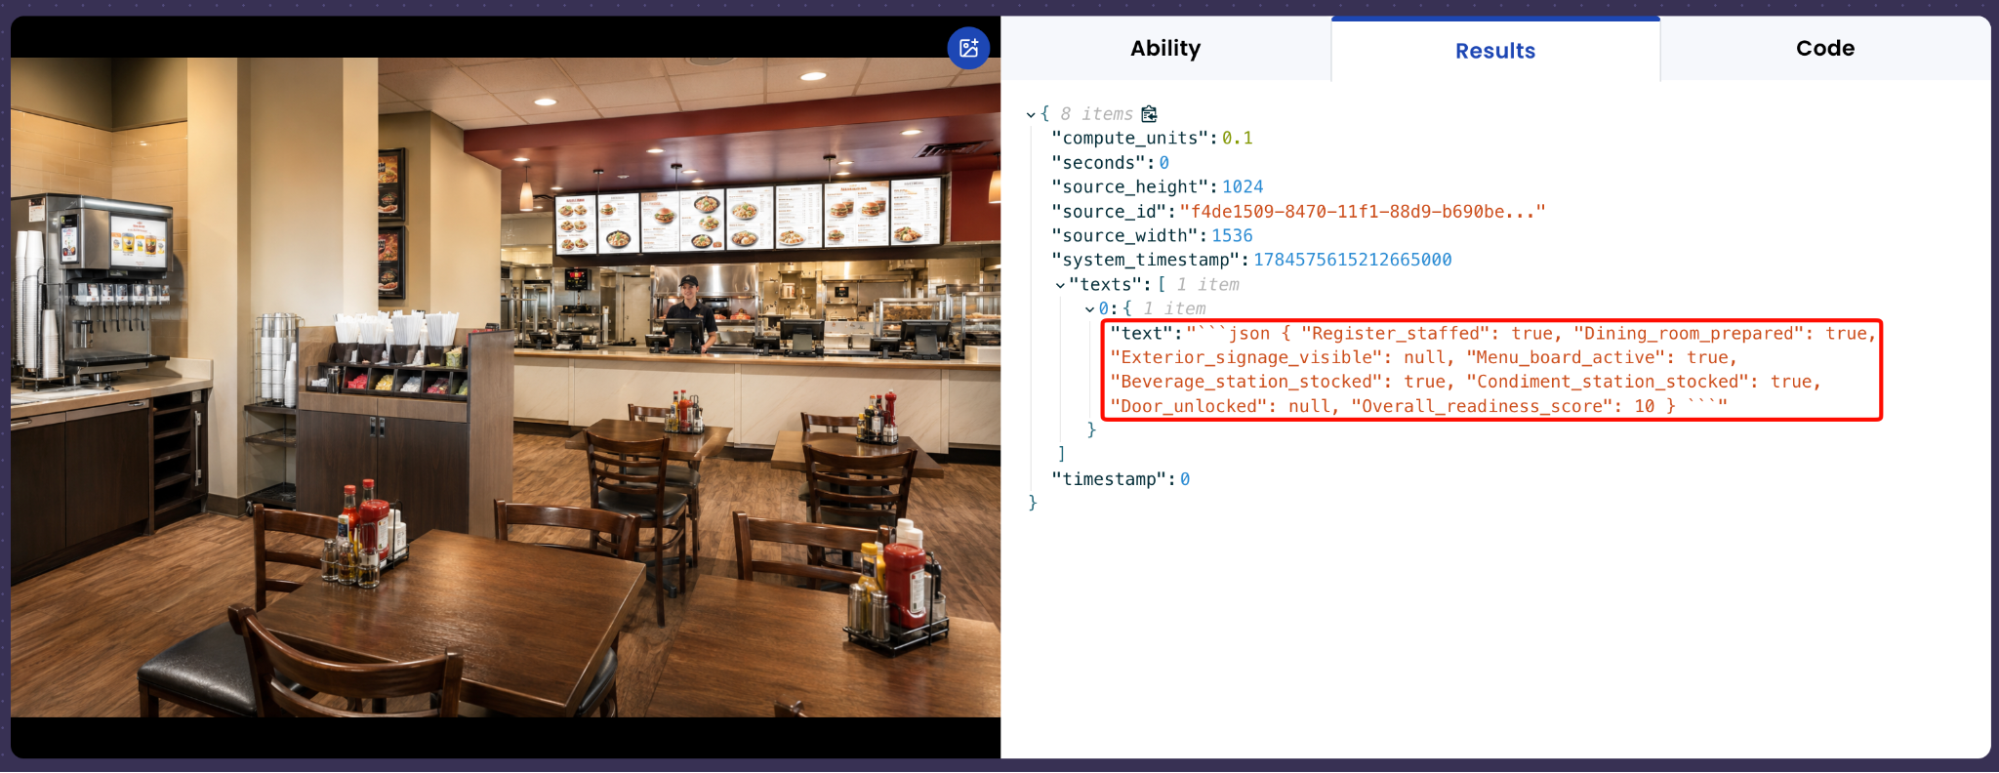
That's it! Clicking on the text will give you the outputted JSON object.
After running the evaluation you can see what the model described and compare it to your source of truth. With this, you can improve your prompts and thus improve your accuracy.
Tips for Accuracy
1. Define the Line Between "Present" and "Ready"
The key to high accuracy is a deep understanding of your specific acceptance criteria. It's not enough to say "check if the register is staffed". You have to define what counts as evidence of each state.
Don't just say "Check if the beverage station is stocked." Instead, specify: "Mark stocked only if cups are loaded, ice is visible, and nozzles appear functional; a single stack of cups alone does not qualify."
Review your "maybe" pile. If you're unsure whether a station in a test image counts as stocked, or whether a screen counts as a register, the model will be too. Write a specific rule for that scenario rather than leaving it to judgment.
2. Explicitly Rule Out Look-Alikes
Vision models will confidently match the closest visual pattern they can find, even if it's the wrong one. Kitchen prep monitors and order-ticket screens can look enough like a POS terminal that the model treats them as one unless you say otherwise.
Call out what does not qualify: "Kitchen prep screens and menu boards do not count as a register. Only a customer-facing checkout point with a card reader or cash drawer counts."
3. Cover Every Null Condition in Your Validation Set
A robust dataset is more important than a large one. For each checklist item, your validation set should include an example where it's clearly true, clearly false, and genuinely absent from frame (null). Skipping the null case is the easiest way to end up with a model that guesses instead of abstaining.
4. Keep the Readiness Score Derived, Not Judged
Don't let the model assign the overall score independently; calculate it from the checklist itself (ready items ÷ applicable items × 10). An independently judged score can contradict the individual item results, which is difficult to explain and undermines trust in the output.
Get early access
Want to move faster with visual automation? Request early access to Abilities and get notified as new vision capabilities roll out.