
Inspecting Bottle Fill Levels
Describes the liquid level % of a bottle in an image.
datasciencealliance-org.image-describe.liquid-bottle-fill:latest
Prompt
...Run the full prompt in your EyePop.ai dashboard
Input
Image
Output
A single percentage value (e.g. "75%") describing how full the bottle's liquid level is relative to its full height.
Image size
640x640
Model type
EyePop.ai VLM

How It Works
Describe with Inspecting Bottle Fill Levels
Problem: Detecting and measuring liquid fill levels in bottles on a production line helps flag underfills or overfills before they reach customers. The same approach can measure filled containers of liquid in other settings, like restaurant inventory, without any manual inspection.
As its name implies, the Describe Image task on the Abilities tab does exactly that: it describes an input image with a description. We can use this to determine what the approximate liquid level percentage is, allowing businesses to automatically flag underfills or overfills without any manual inspection.
We can use the Describe Image task in order to describe the liquid fill levels in bottles as a fill percentage. By automating this visual inspection, businesses can enforce quality control standards, reduce product waste, and catch packaging defects before it reaches production.
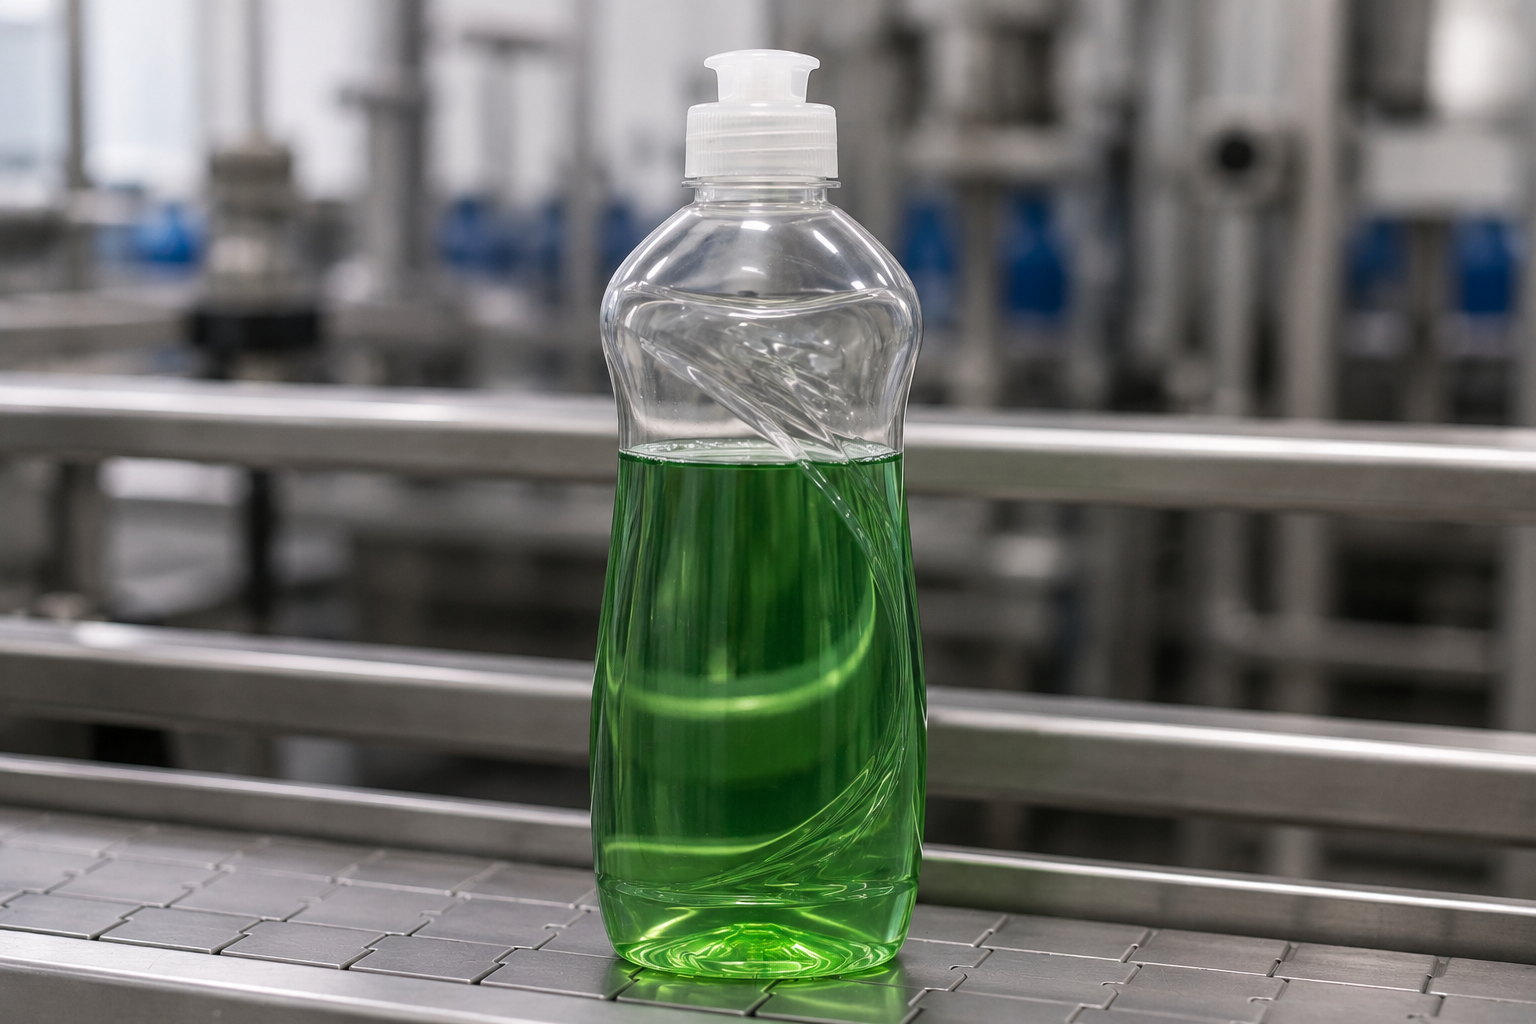
With this ability, it should return a fill percentage that the liquid level in the bottle most closely matches. For example, the output of the image below returns: 75%.
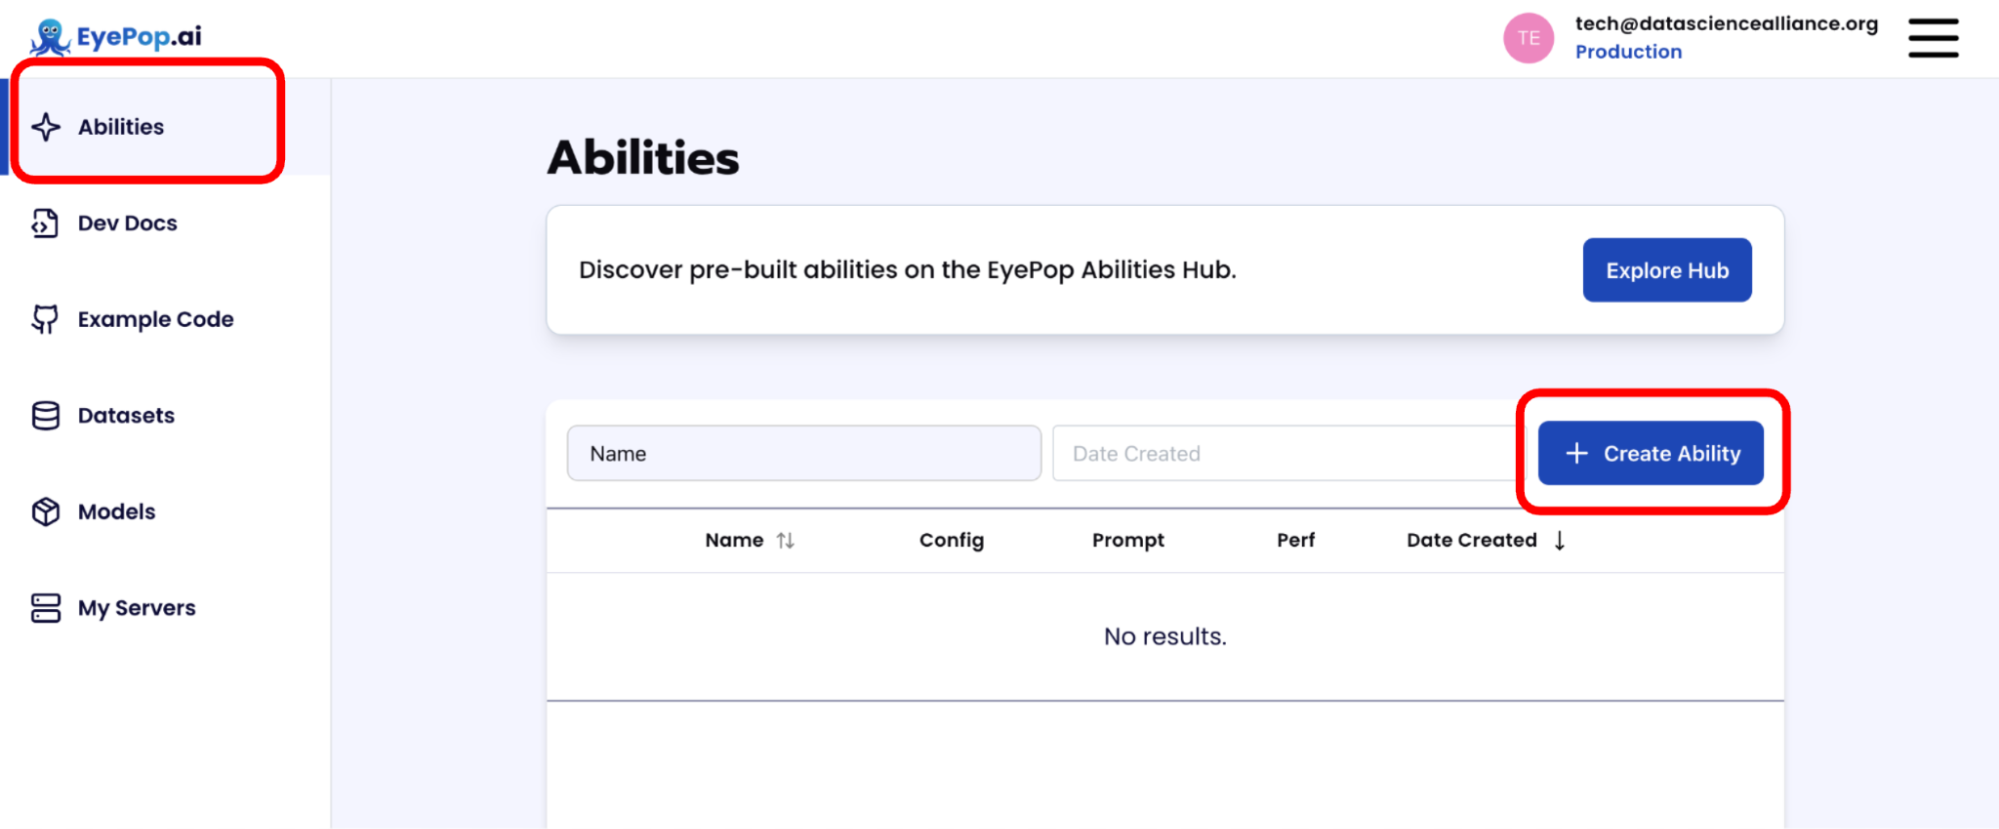
Step 1: Create a Describe Ability
Go to the Abilities tab and select the button Create Ability.
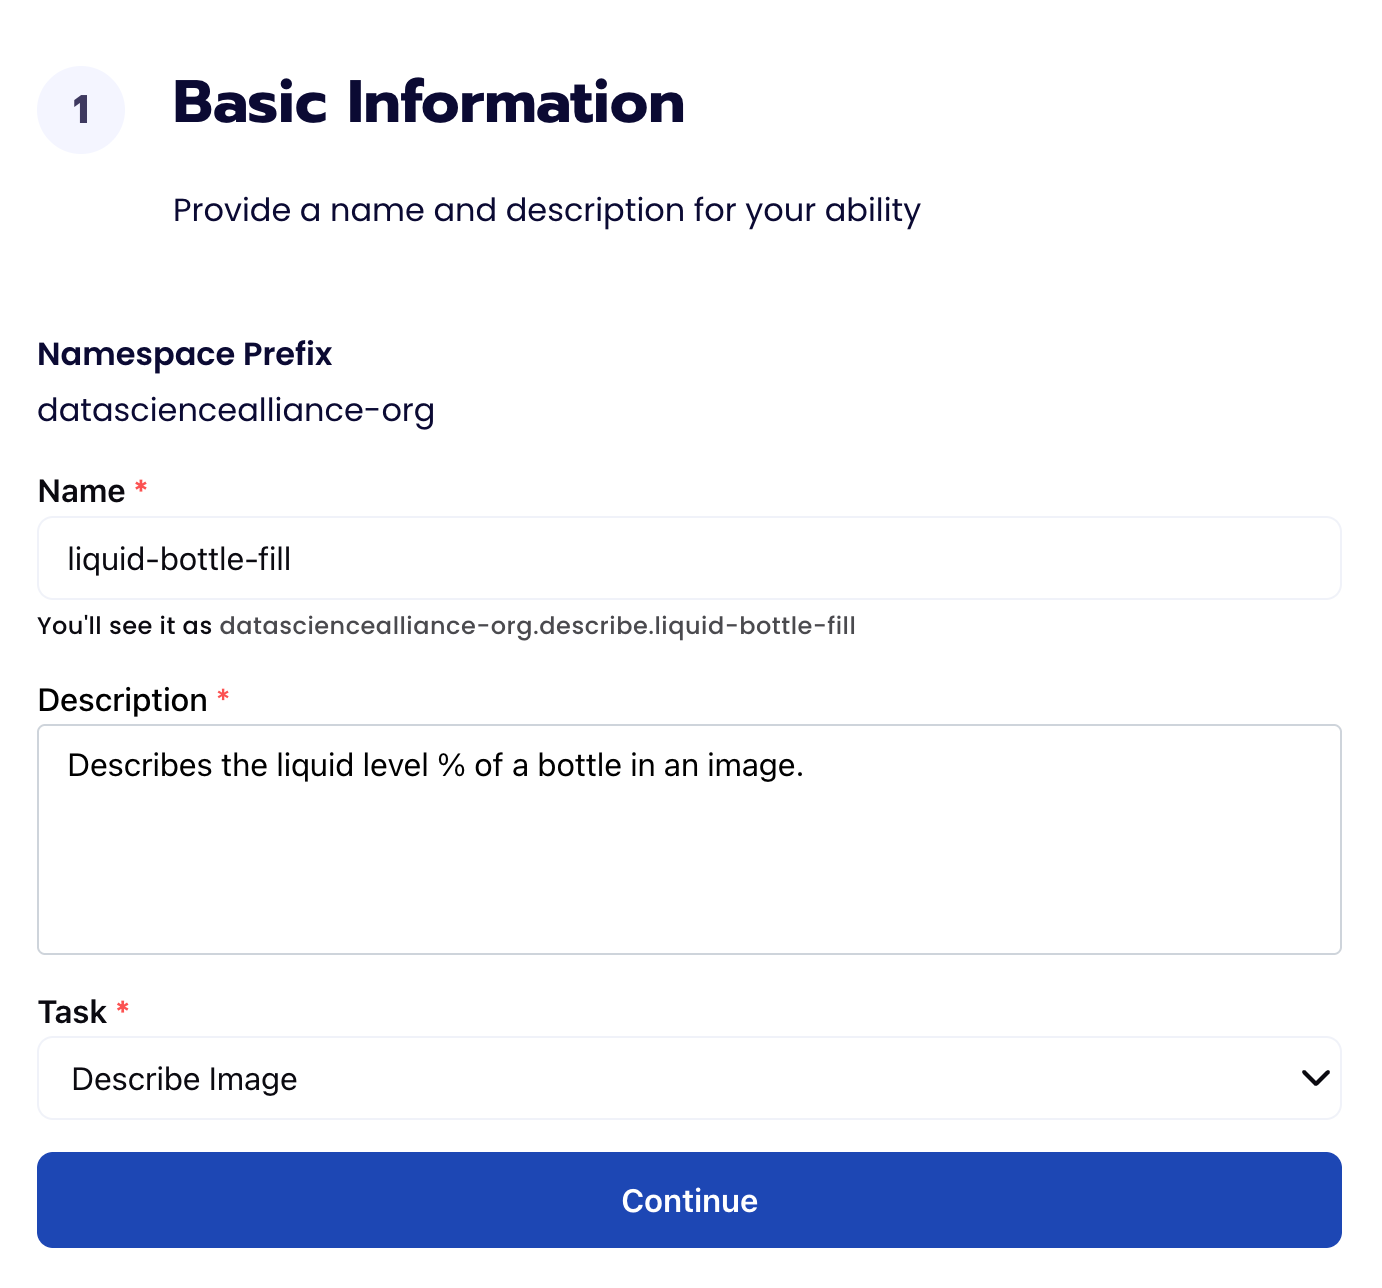
Fill out basic information about the ability such as its name and the description of the task itself. Since we are describing an image, select the Task Type as Describe.
Name: liquid-bottle-fill
Description: Describes the liquid level % of a bottle in an image.
Step 2: Configuration
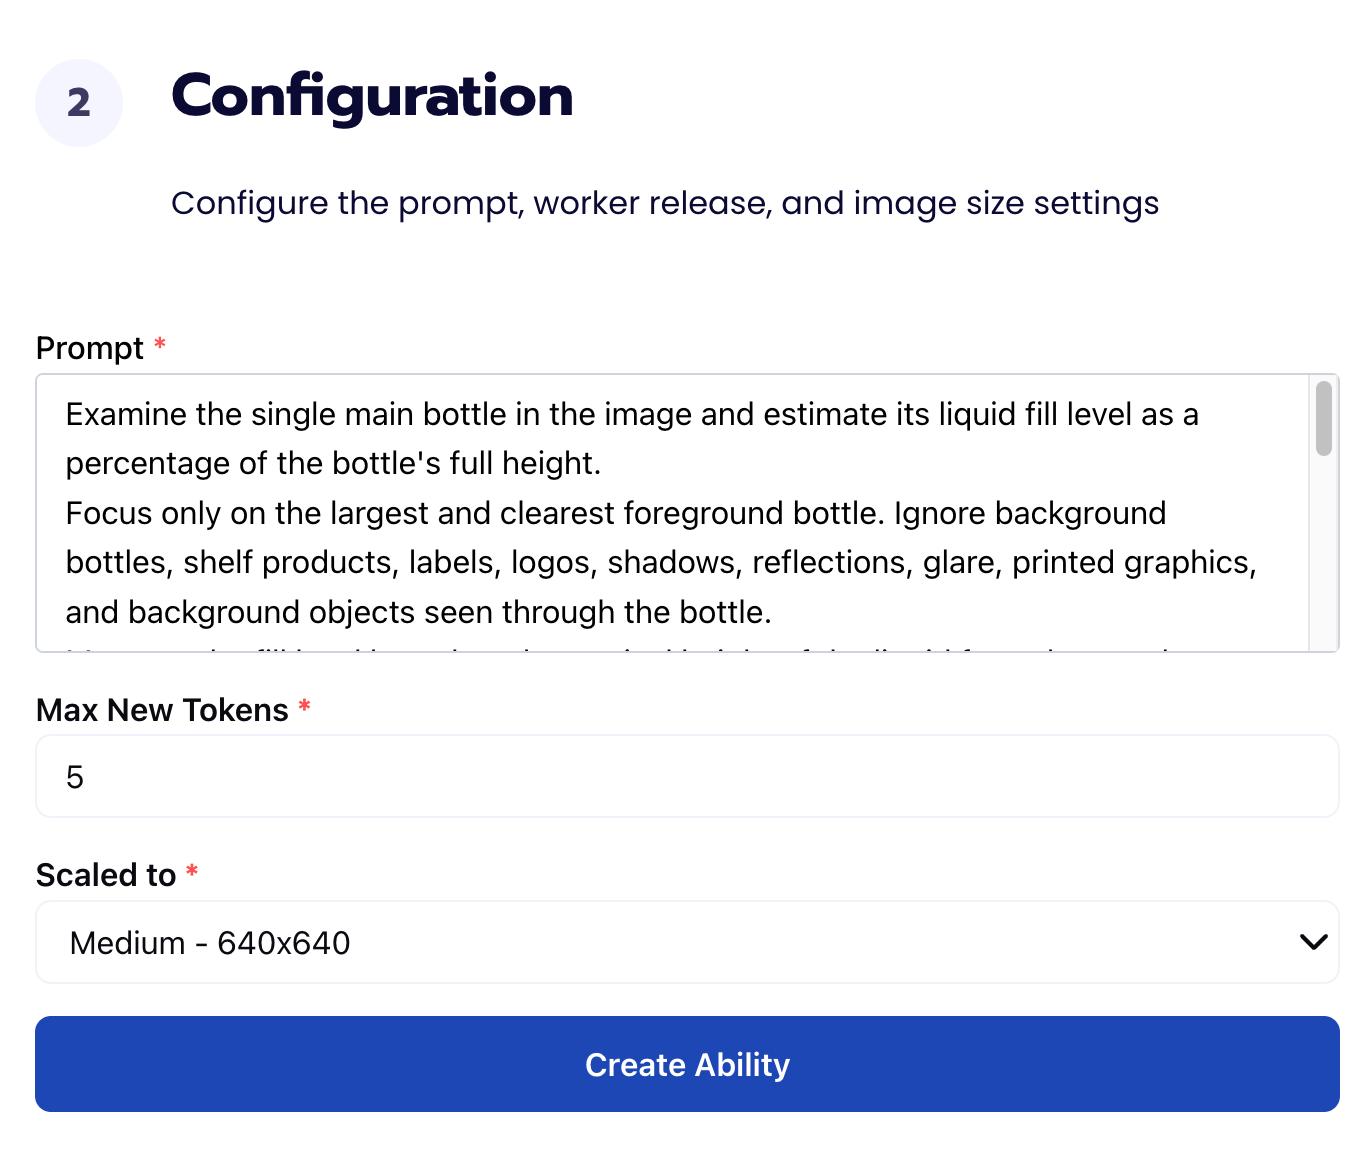
Our next step is to configure the prompt, select the model, and image size. For this use case, we recommend using the below prompt and settings for highest accuracy and best results.
Max New Tokens: 5
Scaled to: Medium - 640x640
Prompt:
Examine the single main bottle in the image and estimate its liquid fill level as a percentage of the bottle's full height.
Focus only on the largest and clearest foreground bottle. Ignore background bottles, shelf products, labels, logos, shadows, reflections, glare, printed graphics, and background objects seen through the bottle.
Measure the fill level based on the vertical height of the liquid from the very bottom of the bottle to the very top of the cap — not by volume. Use this measurement even if the bottle tapers, curves, narrows at the neck, or has an unusual shape. A tapered bottle with liquid halfway up the bottle's height should be estimated near 50%, even if the actual volume is not half.
For clear bottles with clear liquid, look for the visible liquid surface line, meniscus, horizontal boundary, refraction change, bubbles, ripples, or change in brightness or texture caused by the liquid. The background visible through the empty upper part of the bottle is not liquid — do not treat the entire transparent bottle body as filled just because the background is visible through it. If the liquid line is faint, estimate conservatively. Any percentage from 0 to 100 is a valid answer.
Return only a single value in this exact format and nothing else: [X]%
Step 3: Use Preview to Evaluate the Ability
We can use the Preview feature to see the output of an ability.
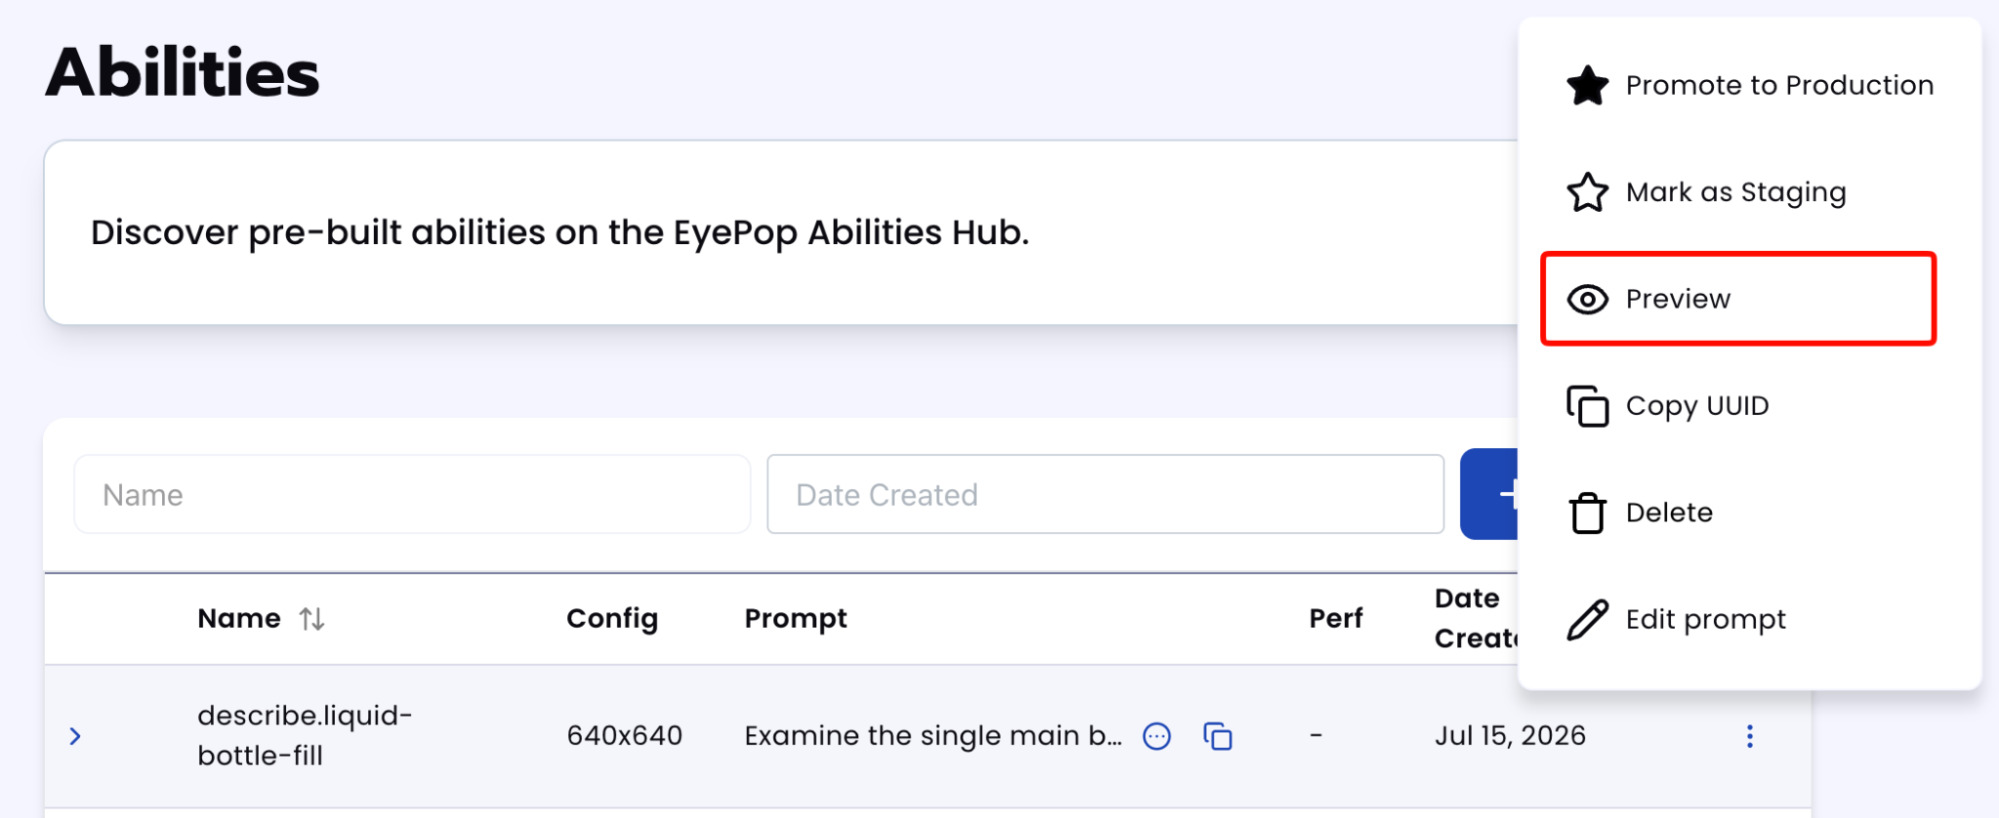
Add your images and under the results tab, check the text output.
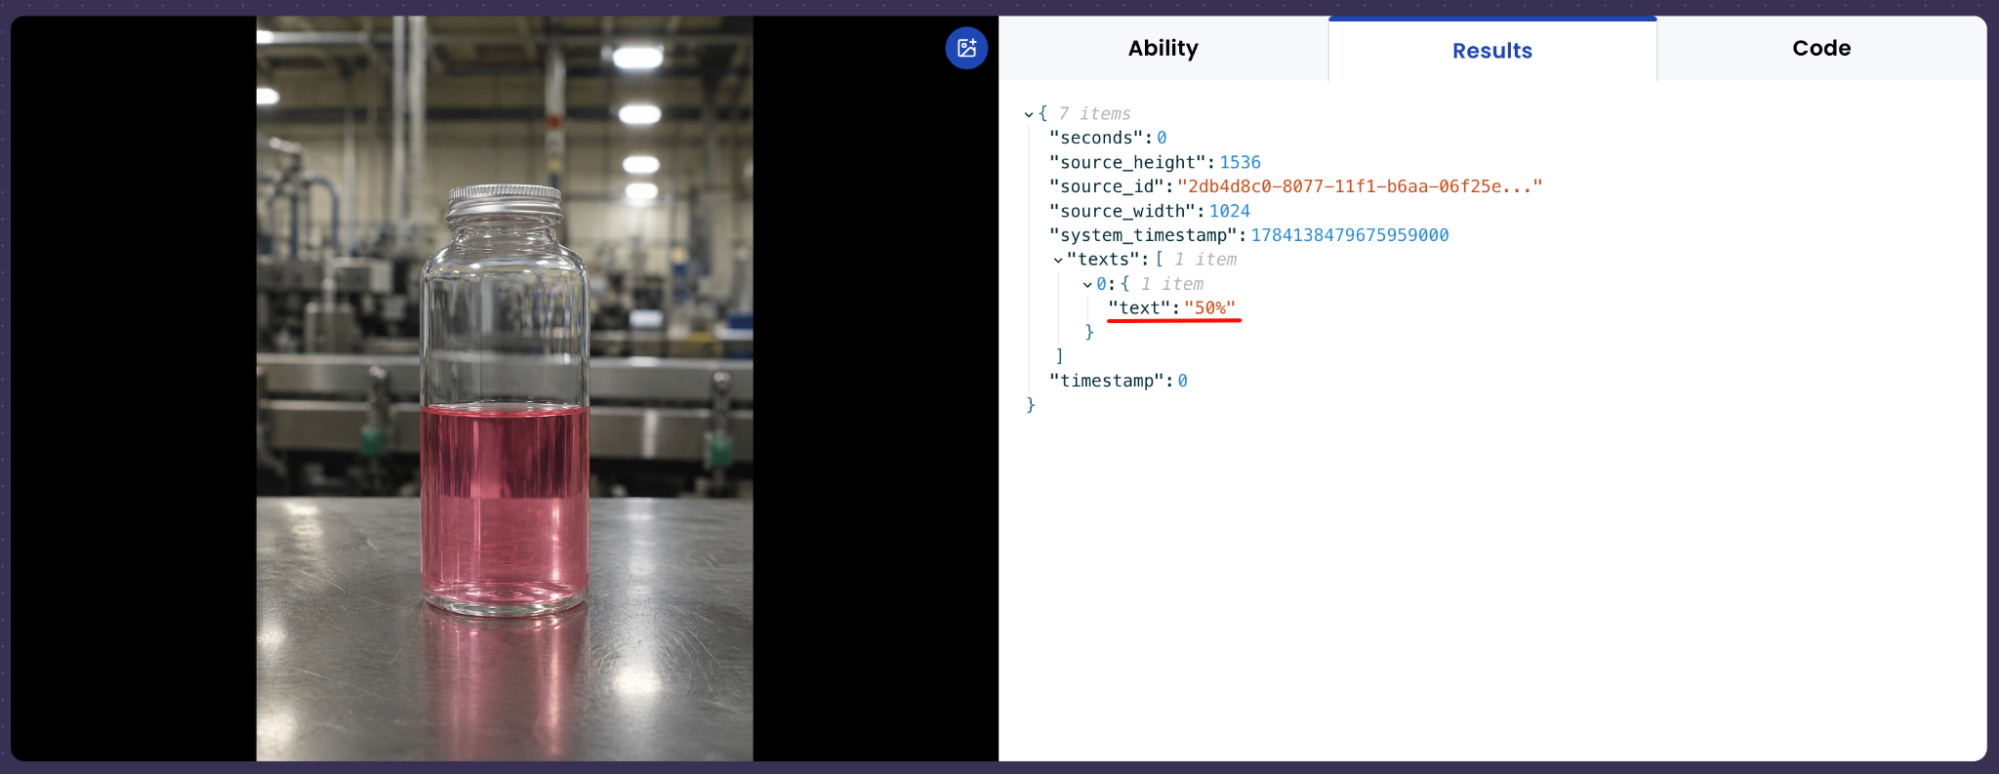
After running the evaluation you can see what the model described and compare it to your source of truth. With this, you can improve your prompts and thus improve your accuracy.
Tips for Accuracy
1. Define "Edge Cases"
The key to high accuracy is a deep understanding of your specific acceptance criteria. In an industry context, the percent fill can be vague. You must be explicitly clear about where that line is drawn.
Don't just say "Reject blurry images." Instead, specify: "Reject images where the liquid level is hard to tell due to blur, but accept images with soft backgrounds."
Review your "maybe" pile. If you are hesitant about an image, the model will be too. Write a specific rule for that scenario.
2. Cover Every Failure Mode
A robust dataset is more important than a large one. Ensure your validation set includes examples of every specific reason for rejection you listed in your prompt.
3. Experiment with Image Resolution
Don't assume that the highest resolution always yields the best results. Providing images that are too large can sometimes reduce accuracy by causing the model to focus on irrelevant fine details (like dust specks or fabric weave) rather than the overall subject or composition.
4. Use Minimal Tokens
Since we are only outputting a number and a percentage symbol, we do not need more than 5 tokens.
Get early access
Want to move faster with visual automation? Request early access to Abilities and get notified as new vision capabilities roll out.