
Food Quality Inspection
Classify produce or packaged goods by defect, ripeness, or contamination
datasciencealliance-org.classify.food-quality:latest
Prompt
Determine the primary content of the image and assign exactly one label: ['Pass_ripe', 'Pass_ok', 'Fail_unripe', 'Fail_defective', 'Fail_contaminated']. Focus only on the single main food item or package that is the clear subject of the image. Ignore background items, shelving, hands, and unrelated objects.
...Run the full prompt in your EyePop.ai dashboard
Input
Image
Output
Pass_ripe, Pass_ok, Fail_contaminated, Fail_unripe, Fail_defective
Image size
640x640
Model type
EyePop.ai VLM

How It Works
Classify with Food Quality
How it works: As its name implies, the Classify Image task on the Abilities tab does exactly that: it classifies an input image into a category. We can use this to determine the quality of a food to see if it is defective, unripe, or contaminated. Making sure that your food product is high quality and safe to consume is vital for customer safety and brand reputation, as defective or contaminated products that reach consumers can lead to health risks, returns, and loss of trust.
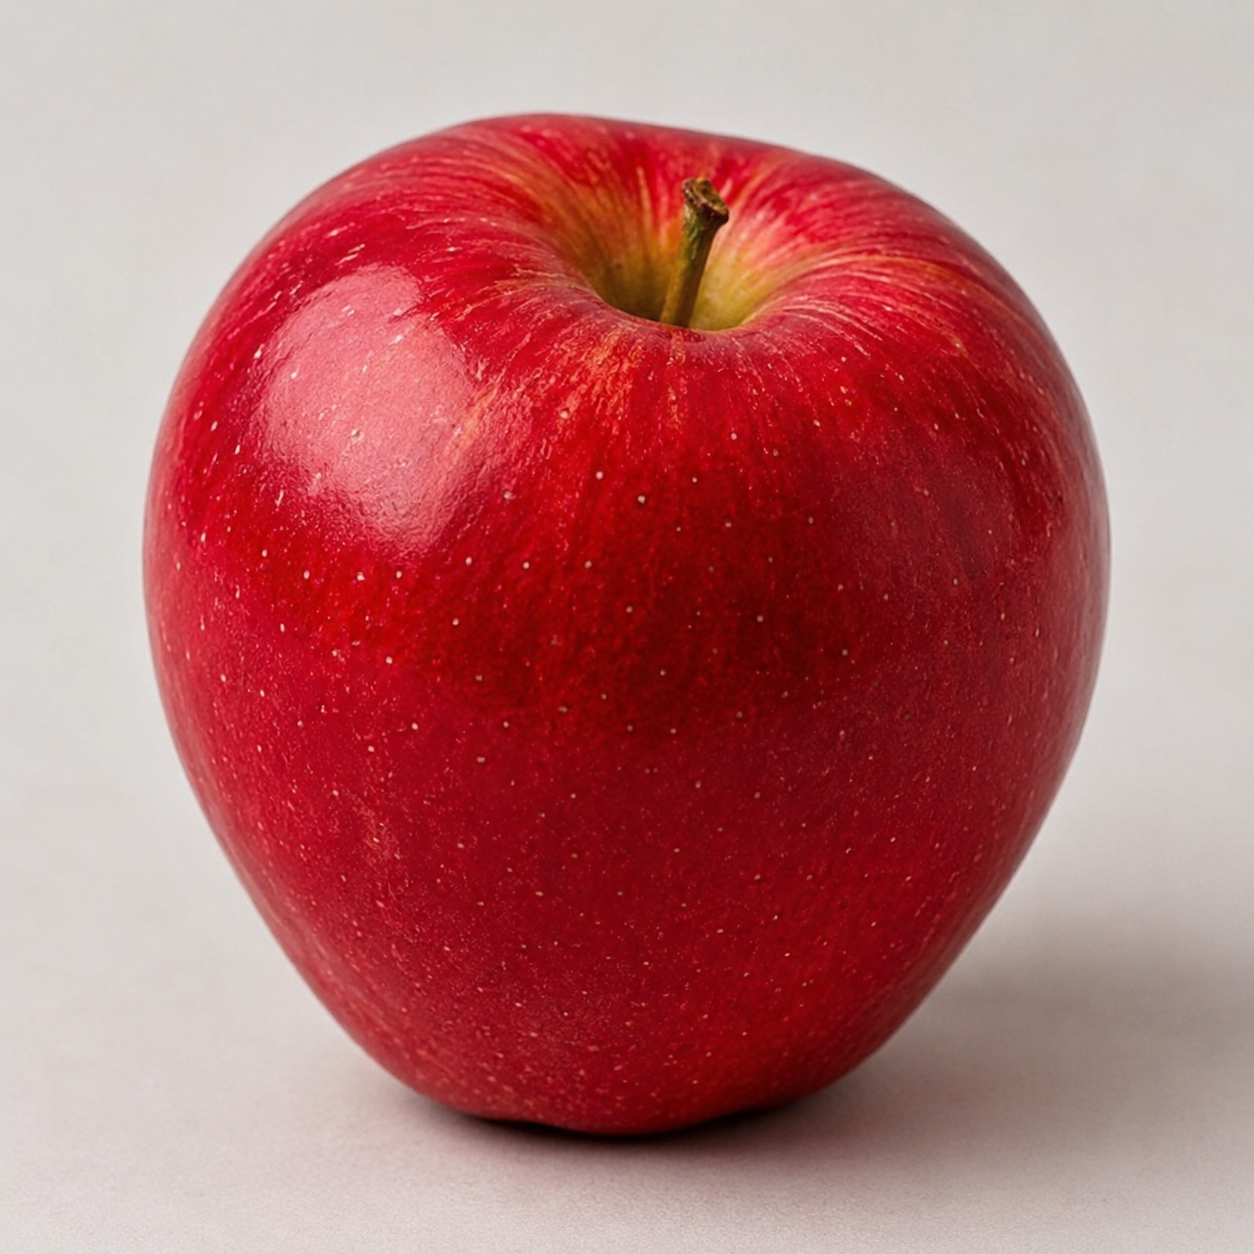
If we take the example of an apple, the image below should be classified as Pass_ripe because the product shows a vibrant apple with no visible bruising or mold.
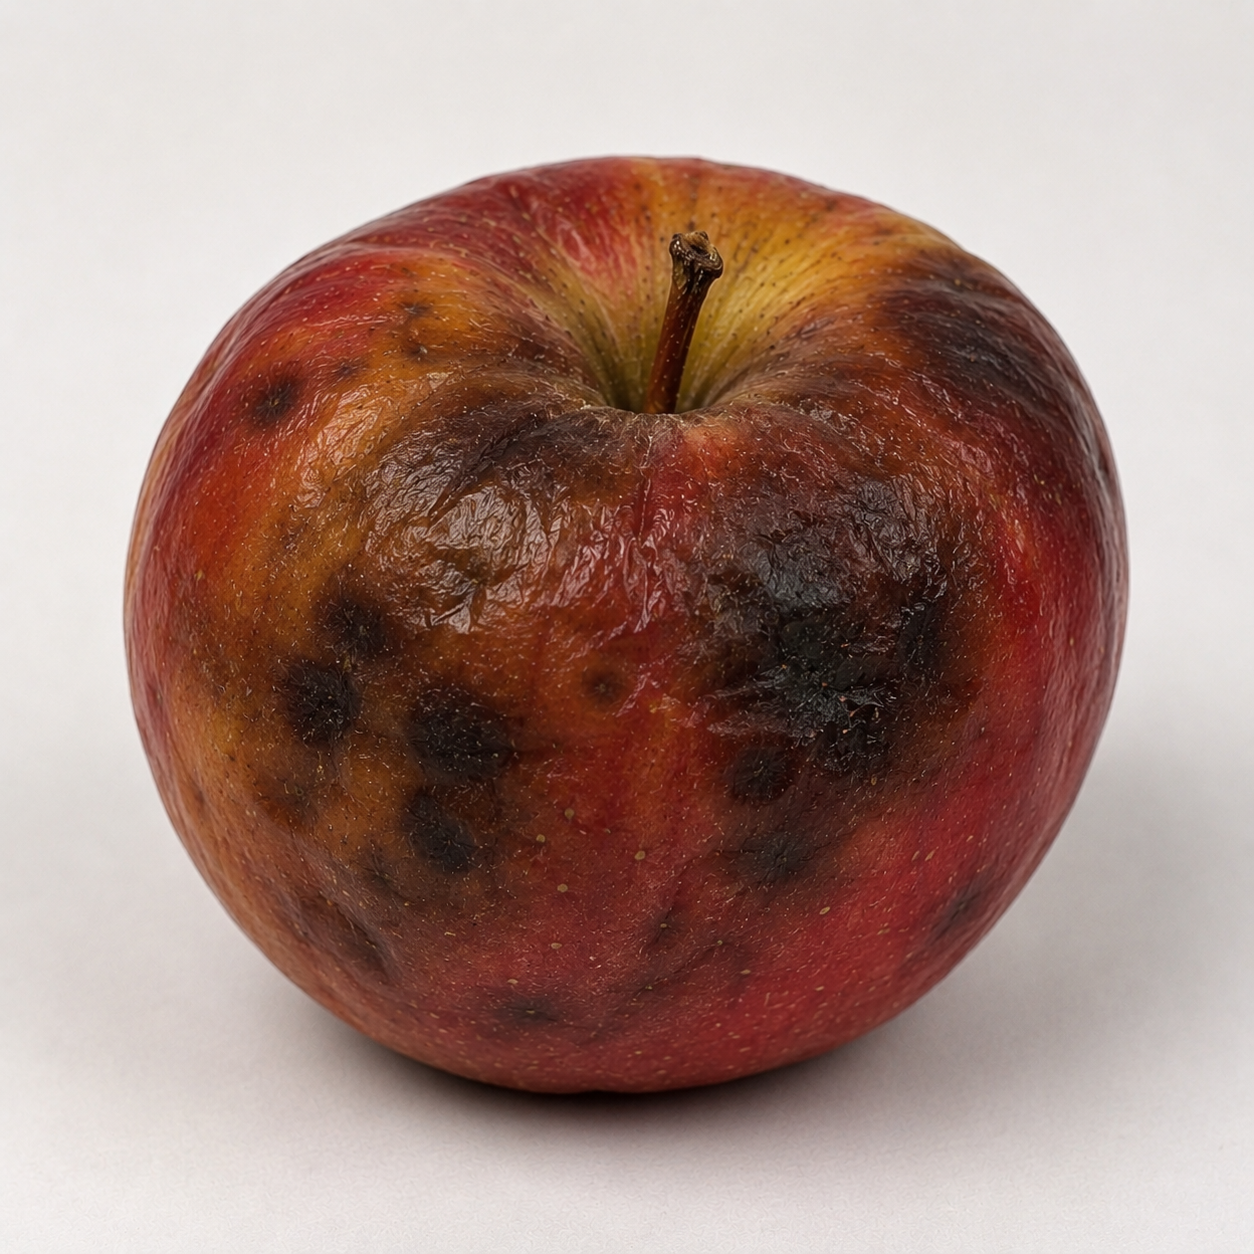
In contrast, the image below should be classified as Fail_contaminated. Although it depicts a similar item, it fails quality standards because it shows mold and bruising, making it unsuitable for sale.
Step 1: Create an Ability
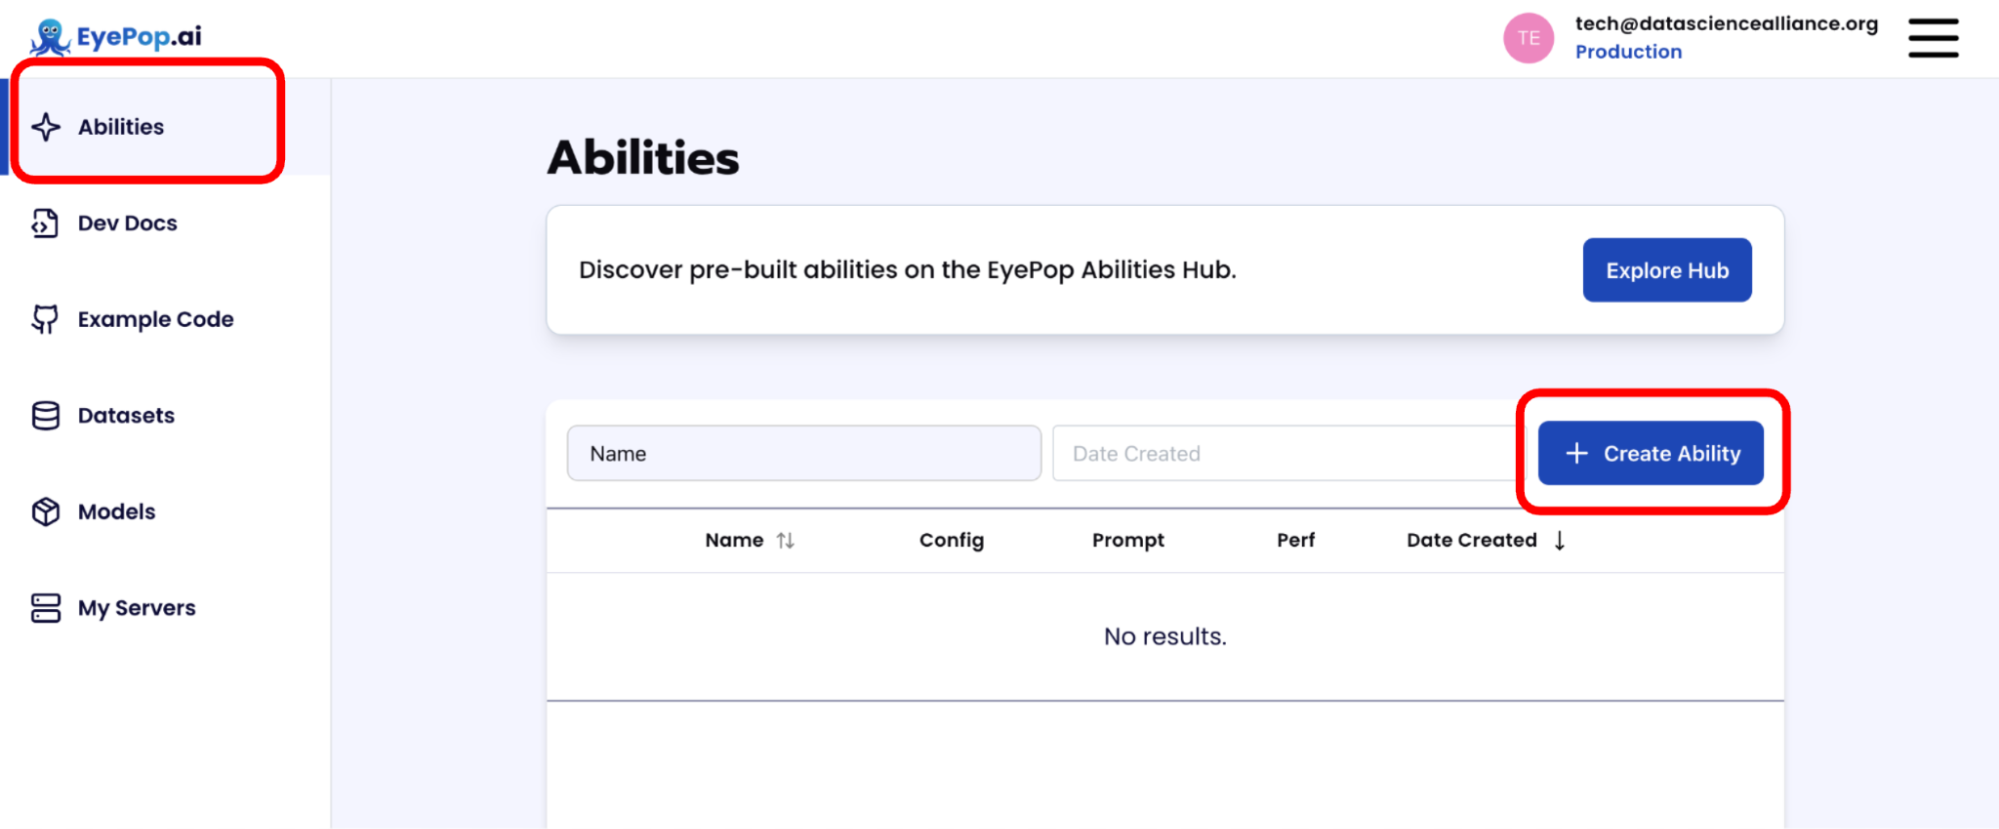
Go to the Abilities tab and select the button Create Ability.
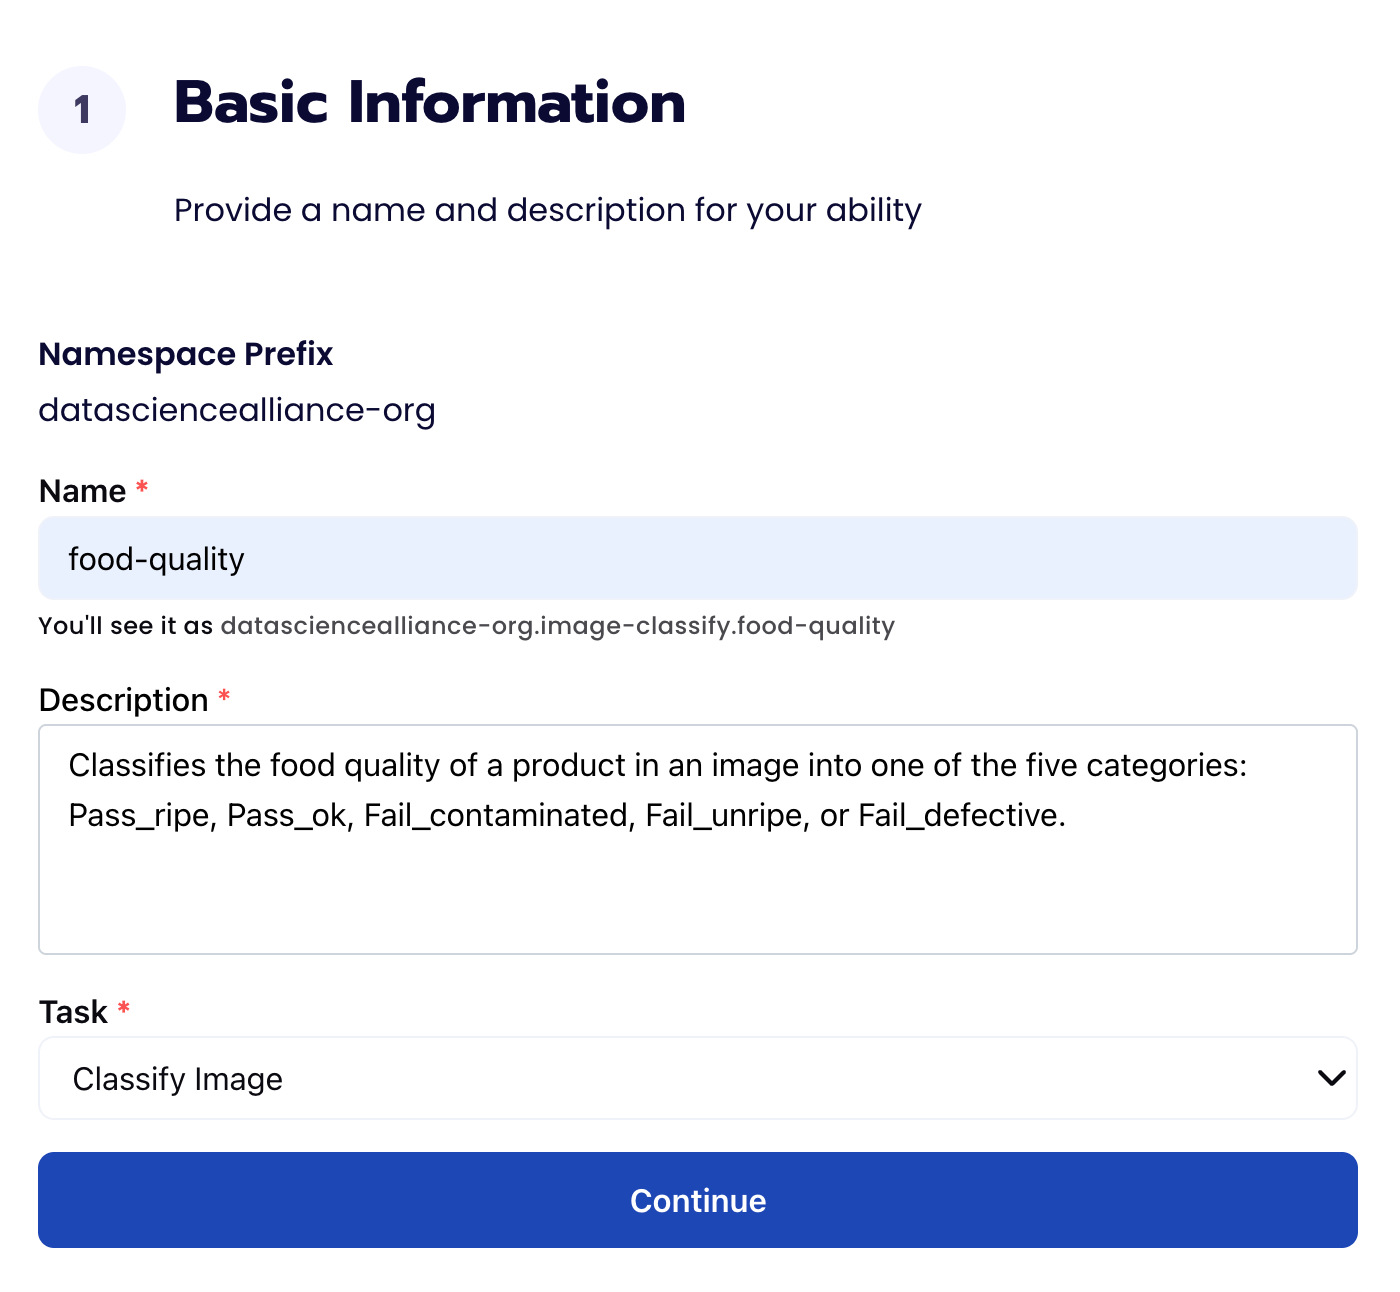
Fill out basic information about the ability such as its name and the description of the task itself. Since we are classifying an image, select the Task Type as Classify.
Step 2: Task Configuration
To configure the task, we need to select a dataset for the specific task. If you have already uploaded your images in a dataset simply select the name of your dataset. However, if you haven't already done so then select <New Dataset> and upload your images and create the labels Pass_ripe, Pass_ok, Fail_contaminated, Fail_unripe, and Fail_defective.
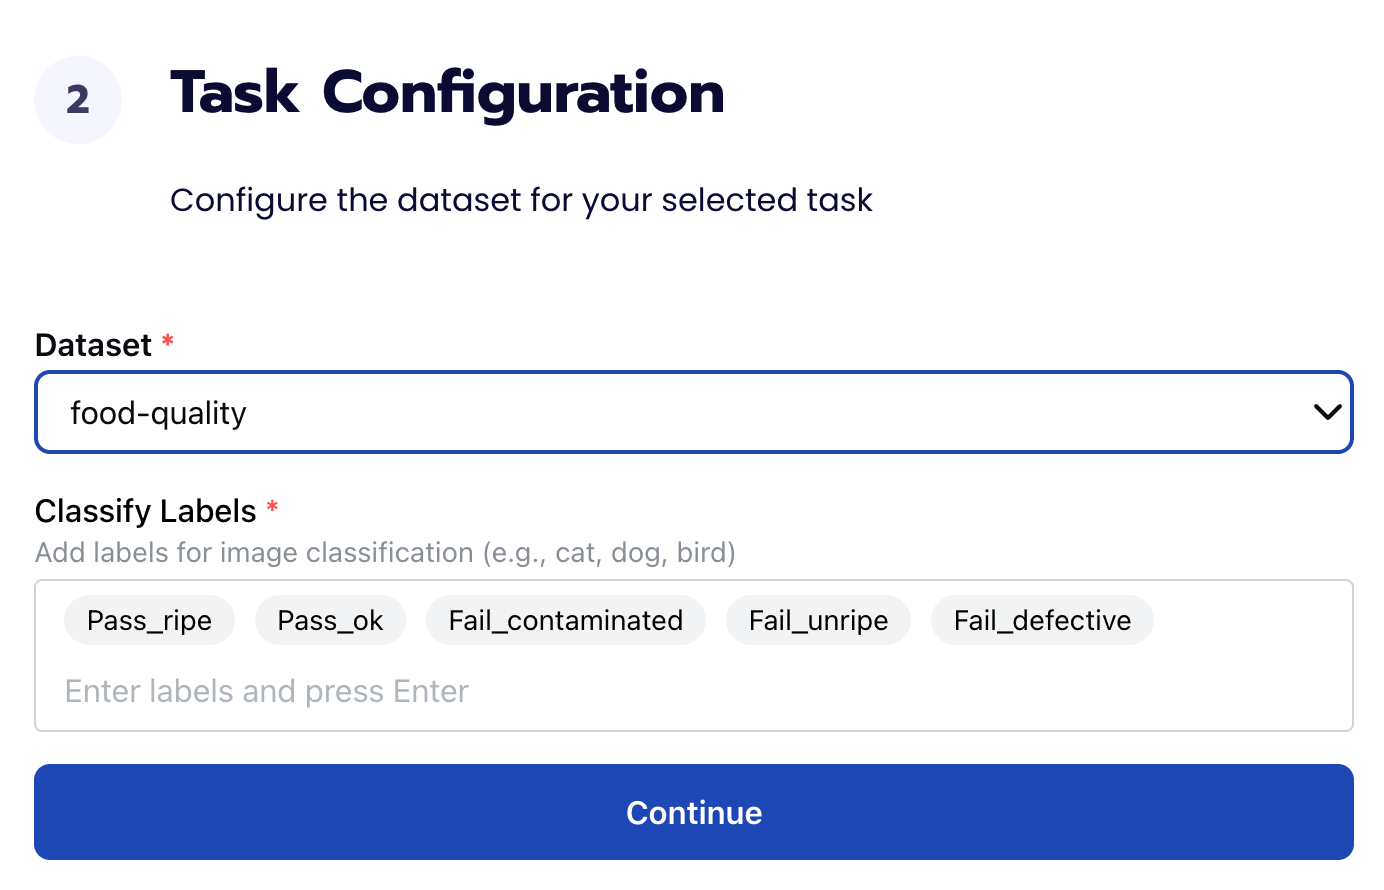
Step 3: Configuration
Our next step is to configure the prompt, select the model, and image size. For this use case, we recommend using the below prompt and settings for highest accuracy and best results.
Prompt:
Determine the primary content of the image and assign exactly one label: ['Pass_ripe', 'Pass_ok', 'Fail_unripe', 'Fail_defective', 'Fail_contaminated'].

Focus only on the single main food item or package that is the clear subject of the image. Ignore background items, shelving, hands, and unrelated objects.

Choose 'Pass_ripe' only if the image's main focus is a piece of fresh produce at peak ripeness, showing full expected color, firmness, and no visible bruising, mold, discoloration, or damage. This label applies to produce only.

Choose 'Pass_ok' only if the image's main focus is a packaged, non-produce food item that is structurally intact and sealed, with no tears, dents, leaks, or breaks. This label applies to packaged goods, not produce.

Choose 'Fail_unripe' only if the image's main focus is a piece of fresh produce that is clearly underripe or immature, such as a green banana, hard unripened avocado, or pale, underdeveloped fruit. The produce should otherwise be firm and free of damage, mold, or spoilage. Do not choose this label for packaged goods.

Choose 'Fail_defective' only if the image's main focus shows clear physical or structural damage with no signs of spoilage or contamination. This includes a dented or crushed box, a torn or punctured bag with contents still fully contained, a cracked jar or bottle lid with no leakage, or a dented can. Do not choose this label if any leaking, mold, dirt, pests, or spoilage is visible.

Choose 'Fail_contaminated' only if the image's main focus shows visible spoilage, mold, bruising on produce, leaking contents, dirt or debris, or signs of pest activity such as holes or droppings. This applies to both produce and packaged goods whenever contamination or spoilage is visibly present, regardless of cause.

If multiple issues are visible, choose the most visually dominant and severe issue, prioritizing contamination over defectiveness if both are present.

Return only the single best-fitting label.
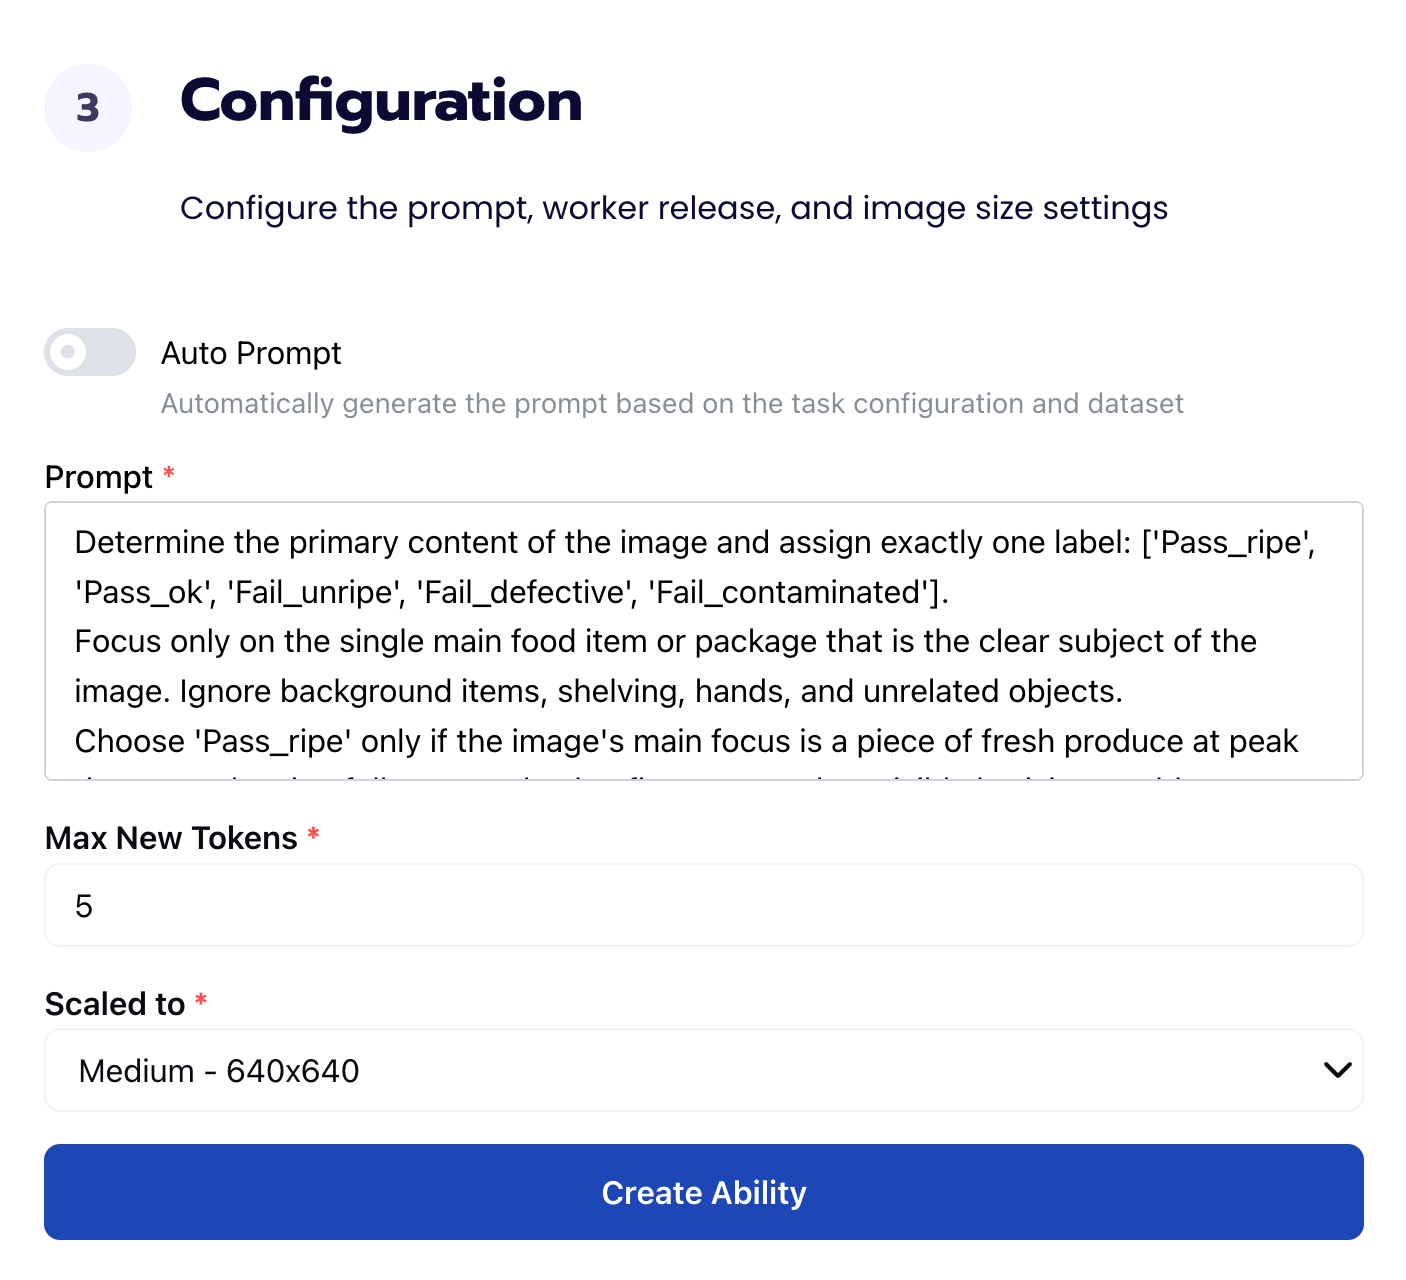
Step 4: Run Evaluation
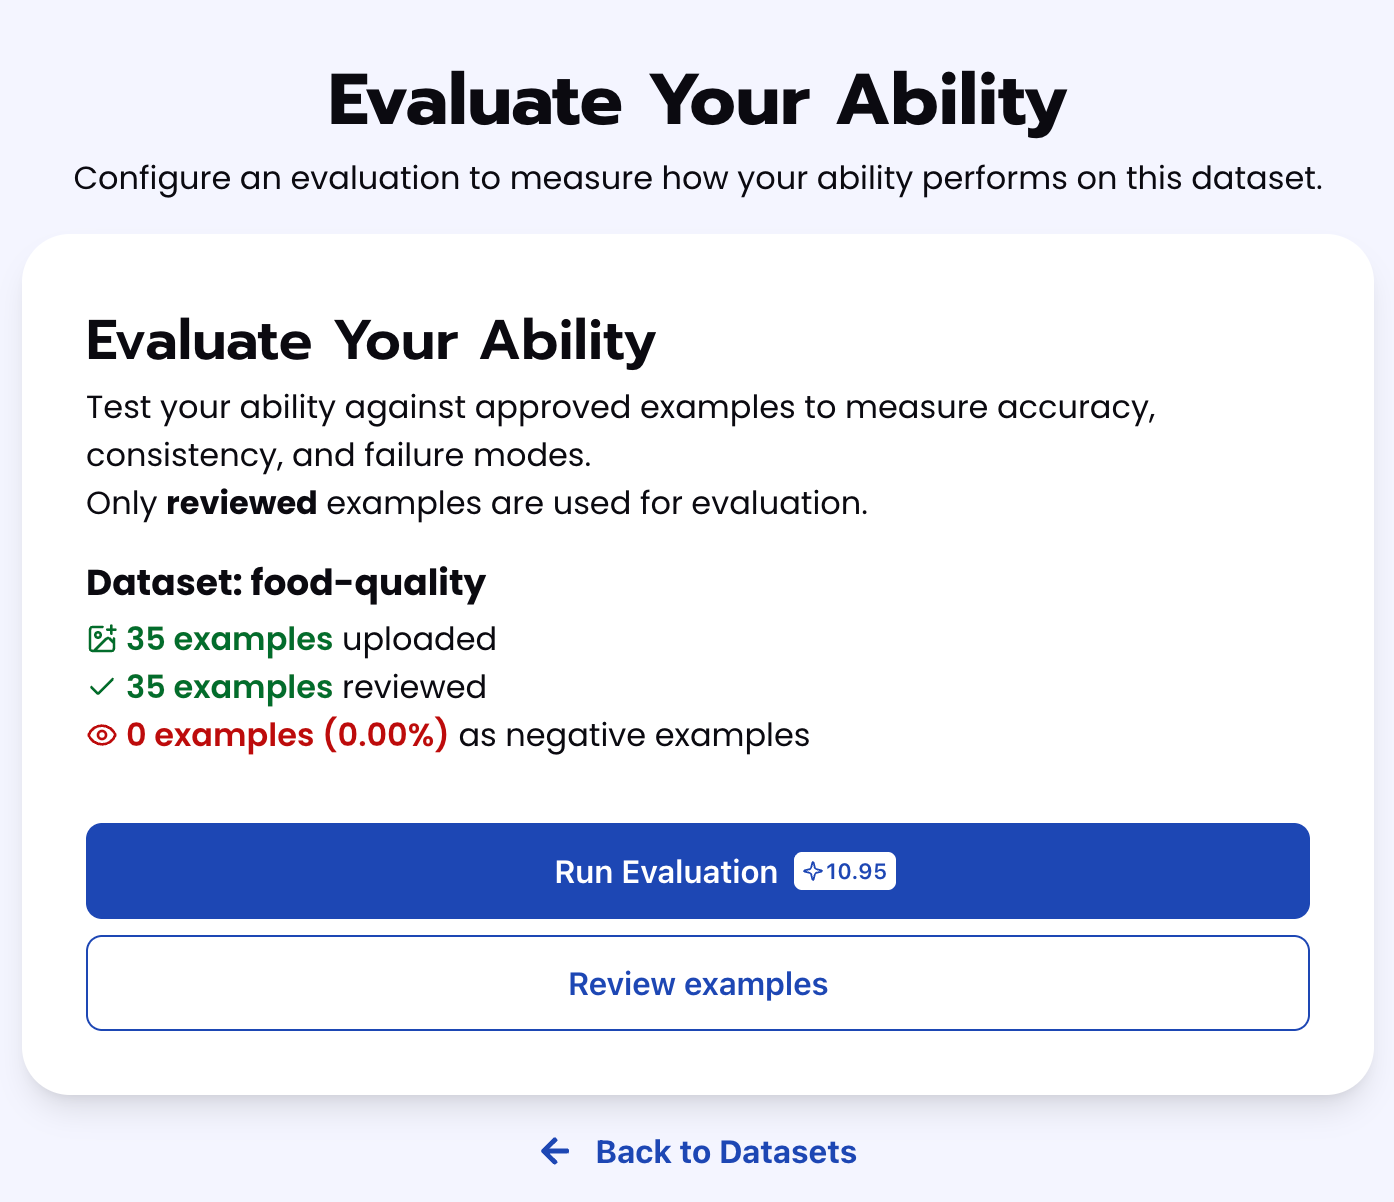
To check how well the prompt does against the dataset, our next step is to run the evaluation. If needed, review the examples in your dataset to ensure all necessary images can be used in the evaluation.
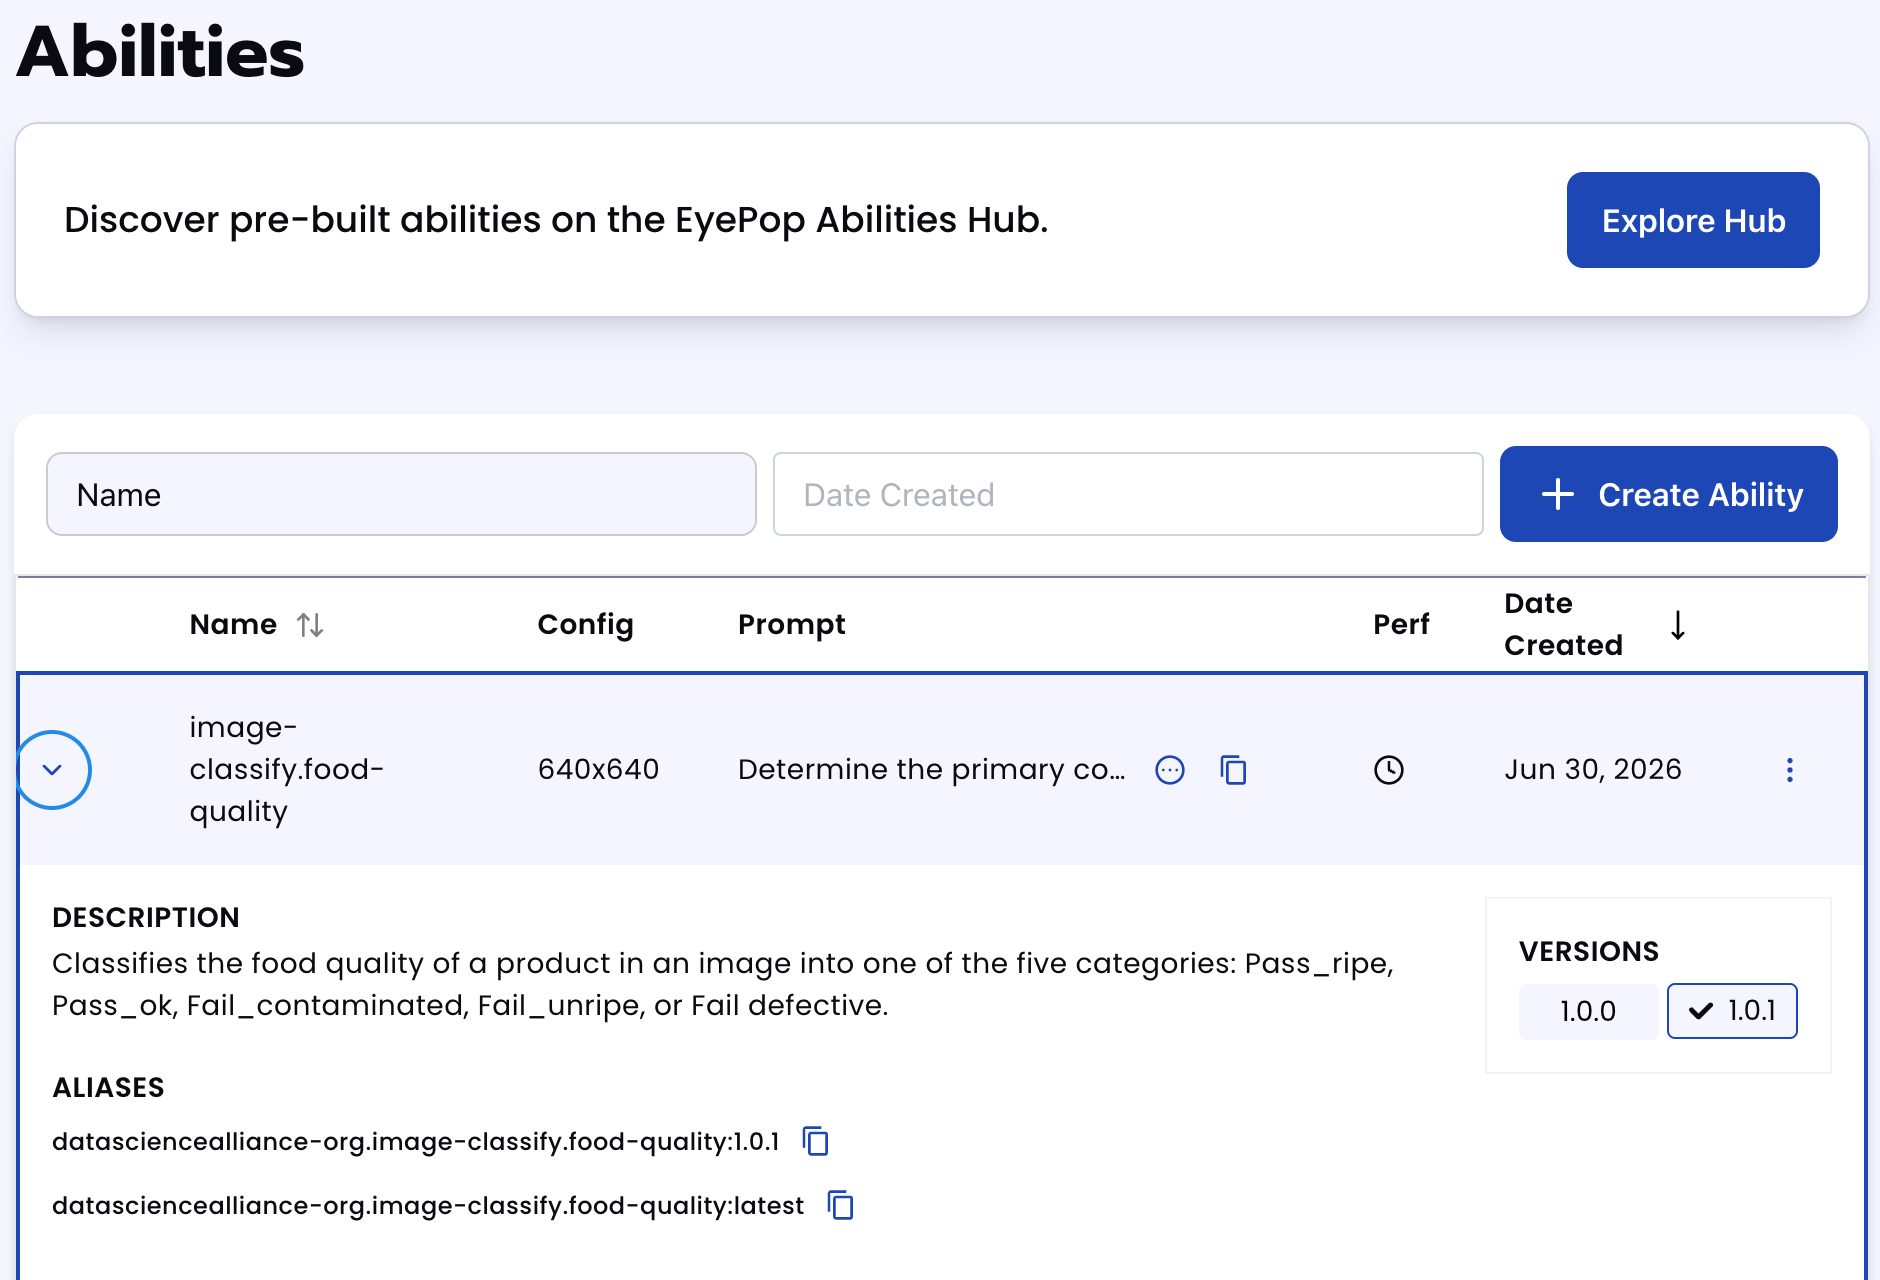
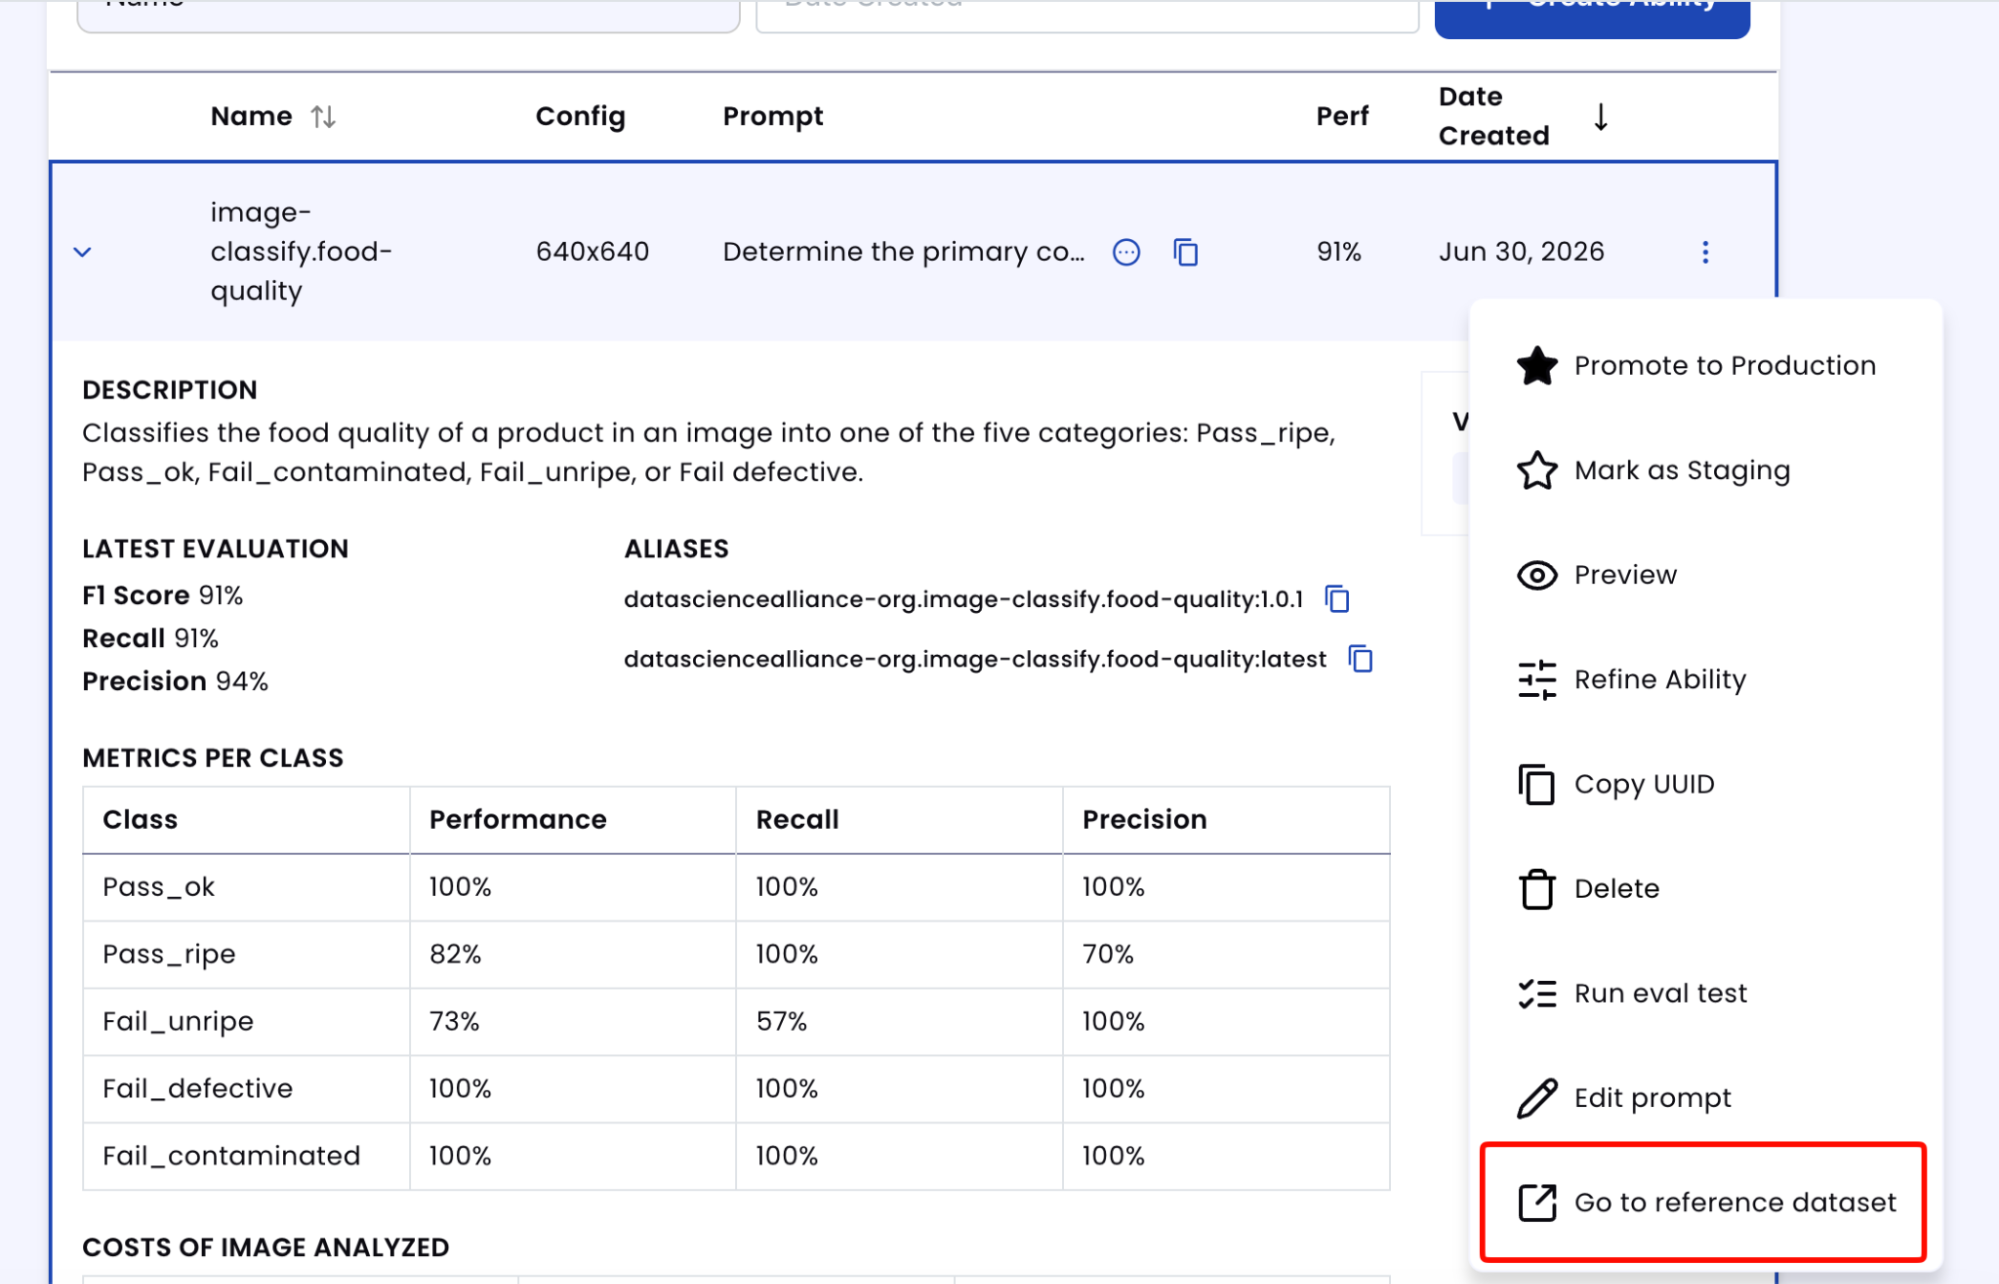
In addition to the performance, recall, and precision percentages on the Abilities tab, you can see a visualization of what the model predicted by revisiting the dataset. Click on the three dots and select "Go to reference dataset". Select one of the images in the dataset and click on the review button. After running the evaluation, you can see what the model labeled as Pass_ripe, Pass_ok, Fail_contaminated, Fail_unripe, or Fail_defective and compare it to your source of truth. With this, you can improve your prompts and thus improve your accuracy.
Tips for Accuracy
1. Explicit "Negative" Case
Telling the model exactly what not to look for is just as important as telling it what to look for. This is because if you only define Pass_ripe, the model might classify naturally green or pale produce as unripe too often or treat any healthy-looking item as ripe regardless of fruit type.
In our prompt, the explicit boundary cases are Fail_unripe and Pass_ok. Fail_unripe covers produce that is clearly immature, while Pass_ok covers packaged goods that are intact and sellable but not "peak" in the way fresh produce is. This helps prevent the model from defaulting to Pass_ripe whenever an item simply looks clean and undamaged.
2. Define "Edge Cases"
The key to high accuracy is a deep understanding of your specific acceptance criteria. In a food quality context, the line between Pass_ripe and Fail_unripe can be thin, especially for produce that is naturally green or pale even at full ripeness.
Examples of edge cases include limes, guavas, and green apples that are ripe despite green coloring; bruising that has progressed into discoloration and could read as either physical damage or spoilage; cracked packaging with no visible leakage versus packaging where contents have begun to leak; and produce with a fresh-looking stem that is actually a sign of early harvest rather than recent picking.
3. Use Balanced Examples
Make sure the dataset has enough examples across all five classes — Pass_ripe, Pass_ok, Fail_unripe, Fail_defective, and Fail_contaminated. If the dataset has too many Pass_ripe examples and not enough Fail_unripe examples, especially for naturally green or pale produce, the model may become biased toward predicting Pass_ripe whenever an item looks visually healthy.
4. Use Synthetic Images Carefully
Synthetic images can help create more examples of ripe, underripe, defective, and contaminated items. However, the synthetic images should still look like realistic product or grocery imagery. Include variations in setting (conveyor belt, store shelf, e-commerce background, shipping box), lighting, and food type so the model does not overfit to one visual style or context.
For Fail_unripe examples, the target produce should show clear signs of immaturity, such as unusual hardness, underdeveloped size, or premature coloring, while otherwise remaining free of damage or spoilage. For Fail_defective examples, the target item should show only structural or packaging damage with no leakage, mold, or spoilage visible. For Fail_contaminated examples, the target item should show clear, unambiguous spoilage, mold, bruising, leakage, dirt, or pest activity.
Get early access
Want to move faster with visual automation? Request early access to Abilities and get notified as new vision capabilities roll out.